
Just when I thought things couldn’t get better than an all-butter crust, I took the advice of baking experts and combined butter with shortening. Oh.my.goodness. Why didn’t I try this sooner?! This tender, flaky, butter and shortening pie crust is perfection! It has the delicious flavor of an all-butter pie crust, but the shortening adds a tenderness that can’t be matched! What I love about using shortening is that it’s way more forgiving to work with than all-butter, believe me.
Why is shortening easier to work with than butter?
Butter can be tricky to work with because it melts super-fast, making the pie dough very fragile and hard to roll out if you’re not careful to keep it cool at all times. Shortening is shelf-stable and retains all of its properties at room temperature. Because shortening is so stable, it doesn’t melt without the presence of high heat. This allows the dough to remain in tact and makes it much easier to work with. Shortening also creates more flaky layers since the fat stays in-tact longer.
Bear in mind that this pie crust recipe uses a combination of butter and chilled shortening so you still have to try to keep the dough as cool as possible, but if it does start to feel a little warm just pop it in the fridge until it firms up again. Your pie crust will still be tender and flaky. In my opinion, pie crust made with shortening is pretty hard to mess up!
So why add butter to the pie-crust, then?
This answer is literally easy as pie. The flavor of butter is unmatched. Period. Everyone loves the rich and salty flavor of butter. And yes, I recommend using salted butter in pie crust, for tastier results. So in short, this recipe uses shortening for its properties, and butter for flavor. I’ll never make claims that using shortening is healthy, but how often are you really going to have the motivation to bake an entire pie crust from scratch?
How much pie crust does this recipe yield?
This butter and shortening pie crust recipe yields 2 crusts. If your recipe only calls for 1 pie crust (like my maple pumpkin pie recipe), you can refrigerate the other crust for up to 5 days or freeze it. If your recipe calls for a double crust (like my classic apple pie recipe) you’ll need both pie crusts.
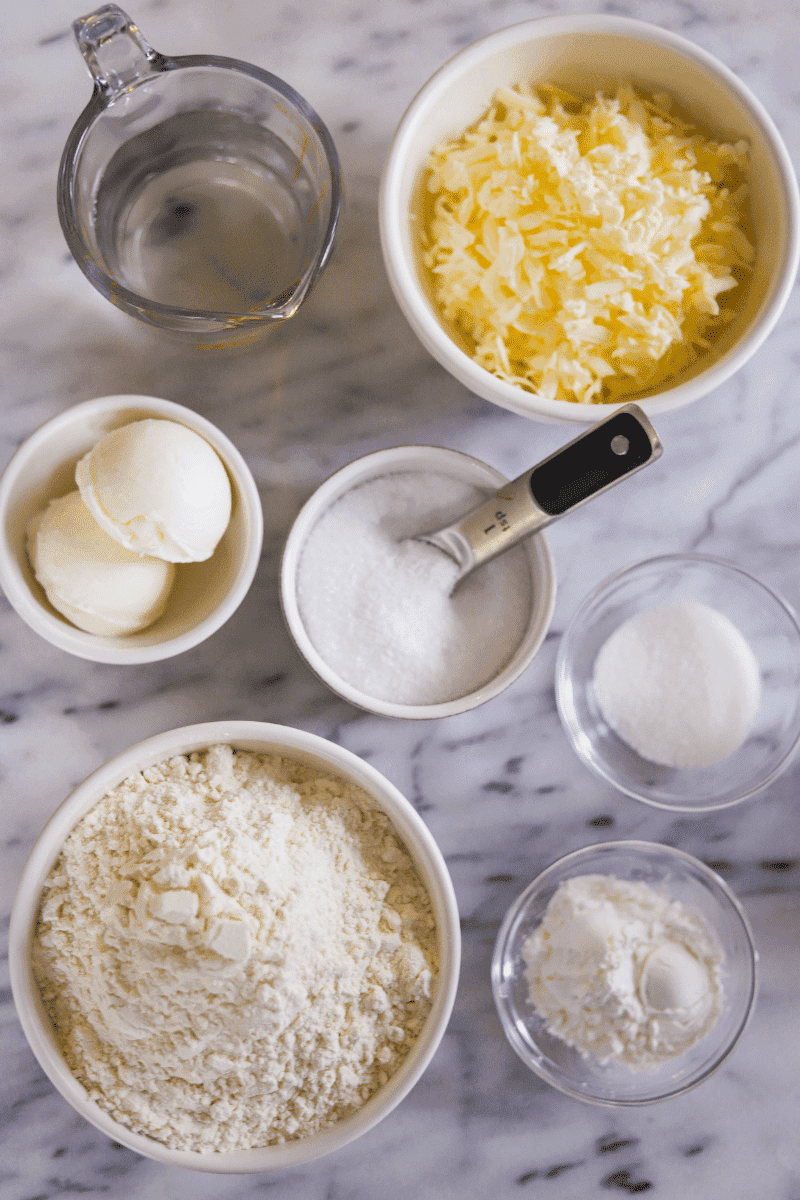
Step 1: Prep your ingredients
First, you’ll want to measure out all ingredients and keep them within arm’s reach. Since we are aiming to keep the ingredients as cold as possible, you don’t want to be scrambling around the kitchen to locate ingredients as you go.
I also like to shred my frozen stick of butter with a box grater before mixing it with the dry ingredients. Shredding the butter makes it much easier to cut the butter and shortening into the flour.
Lastly, add about 3 ice cubes and apple cider vinegar to the cold water and let it sit while you’re combining the butter and shortening with the dry ingredients. Ice cold water will help to keep the dough nice and cold.
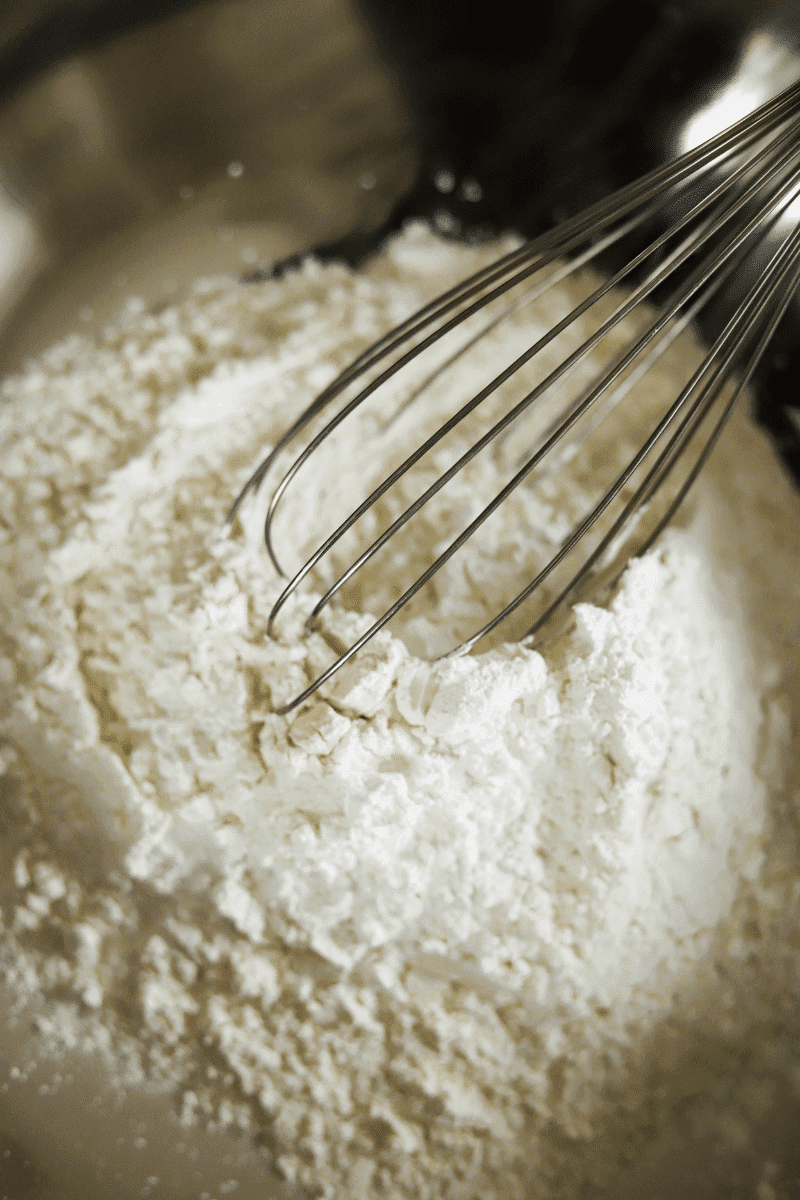
Step 2: Combine the dry ingredients
Whisk together the flour, salt, and sugar, and move along to the next step. I like to use a 7.5 quart steel mixing bowl, which leaves me plenty of room to mix without making a mess.
Step 3: Combine the fat with the dry ingredients
You’ll need a pastry cutter to do this. If you don’t have a pastry cutter, I suppose 2 forks will do, it’ll just be a little more manual. Cut the butter and shortening into the flour mixture so that they form little flakes or crumbles like the photo below. The fat should be evenly distributed throughout the flour mixture.

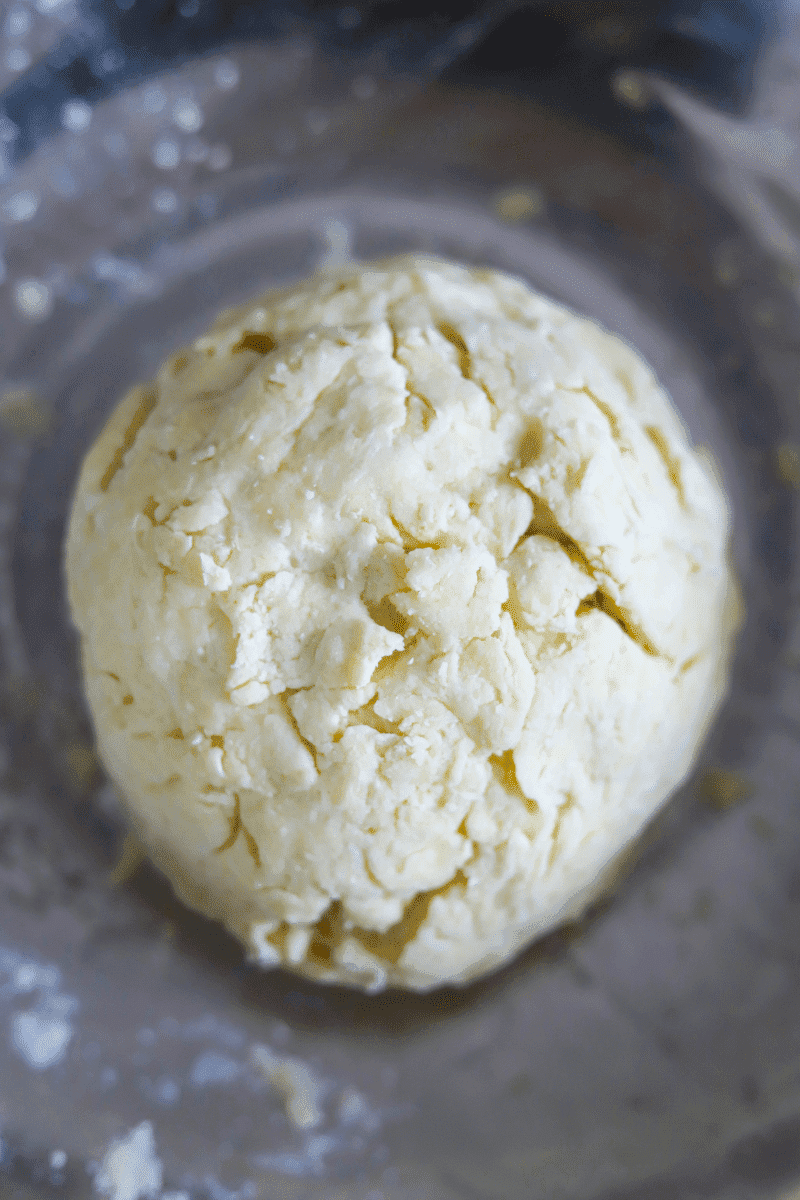
Step 4: Add the water in slowly and form a ball
I usually start off by digging a little well in the middle of the fat and flour mixture. Then I’ll pour a small amount of water into the well and push the flour into the middle to create a ball. Add more water (a few tablespoons at a time) and you should be able to form your dough into a loose ball. The dough should feel damp and tacky but not wet.

Three-quarters of a cup of water with a few ice cubes always seems to do the trick for me. If your dough seems too wet and sticky, try adding a few more tablespoons of flour. As mentioned above, you should be able to form the dough into a loose ball, like the one pictured below.
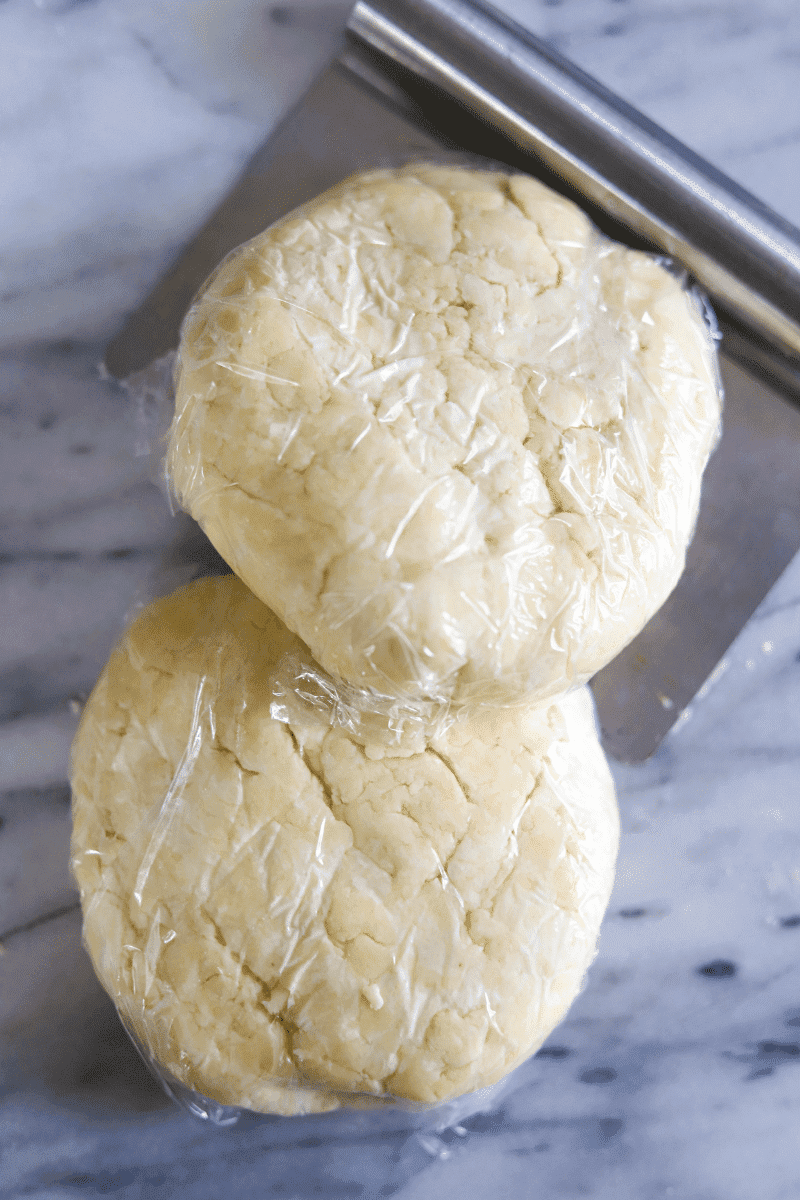
Step 5: Split the dough, wrap and chill
Using a dough scraper, divide the ball of dough into 2, and form each half into a round disc. Wrap each disc in plastic wrap and let the dough rest in the refrigerator for 1.5 to 2 full hours. This is a very important step because it allows the gluten to relax and the fat to firm up again. Relaxed gluten yields a tough crust.
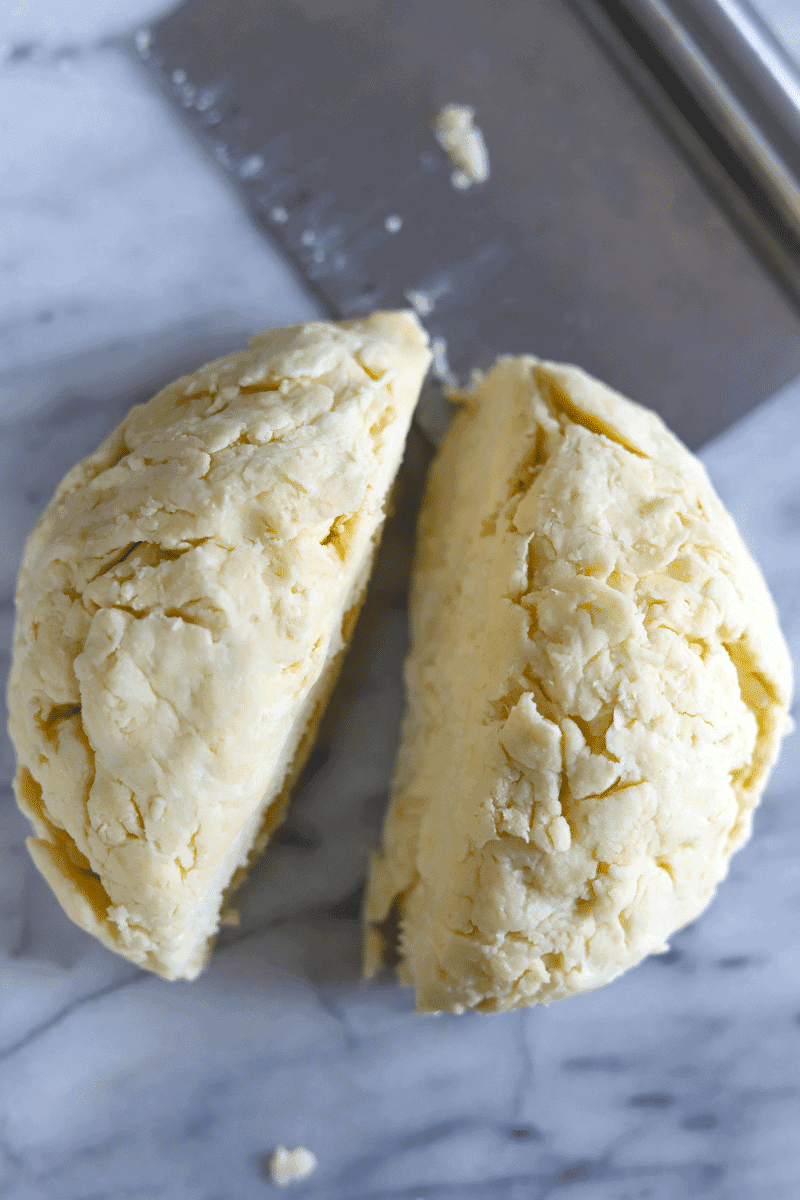
If you shorten the resting period you will end up with a shrunken pie crust, so it’s important not to take any shortcuts with letting your dough rest in the refrigerator.
Step 6: Roll the dough and transfer to a pie plate
I don’t know about you, but this is my favorite part. Before rolling out the dough, generously flour your surface with a few tablespoons of flour. Then flour your rolling pin and roll the dough out to a 12-inch circle. As you can see, it doesn’t have to be a perfect circle, but try to get it as round as you can.
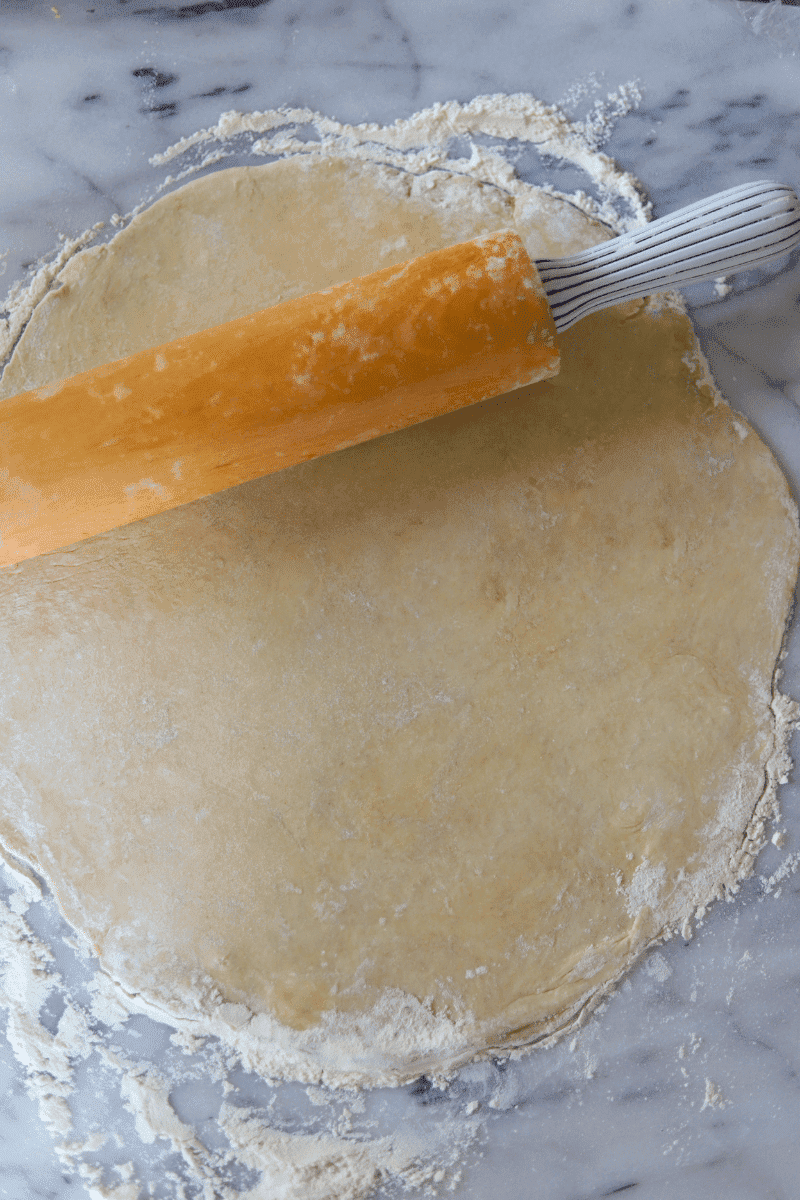
Drape the dough over your rolling pin by rolling it loosely. If you find that your dough is sticking to the surface that you rolled it on, use your dough scraper to gently release the dough from the surface that you rolled it out on.
Unroll the dough over a glass pie plate and ease the dough into the plate. Trim any excess dough so that it extends about a half-inch past the rim of the pie plate and tuck the excess under.
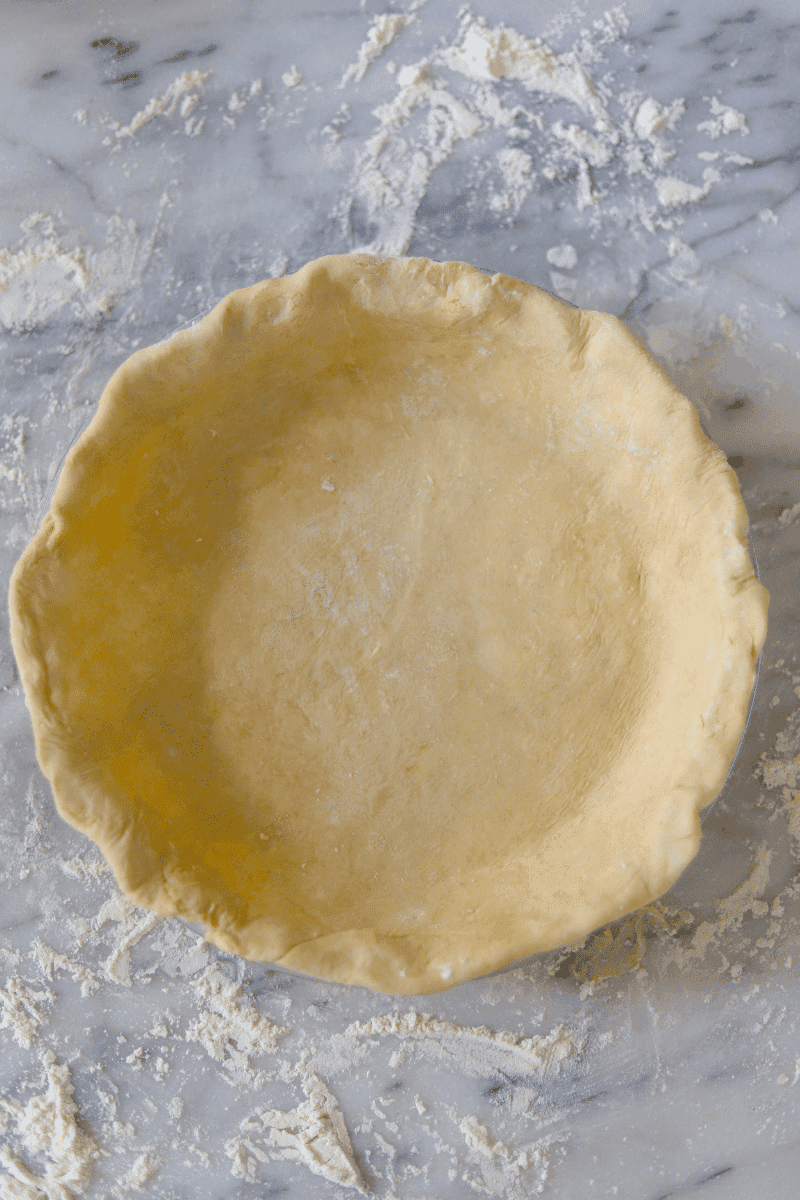
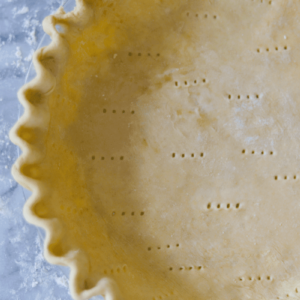
If your pie crust recipe calls for a single crust, crimp the edges by pinching one of your index fingers between your thumb and your other index finger, and dock the pie crust. Docking is when you poke holes in the bottom of the pie shell using a fork, so that steam escapes while baking. I always dock my pie shells.
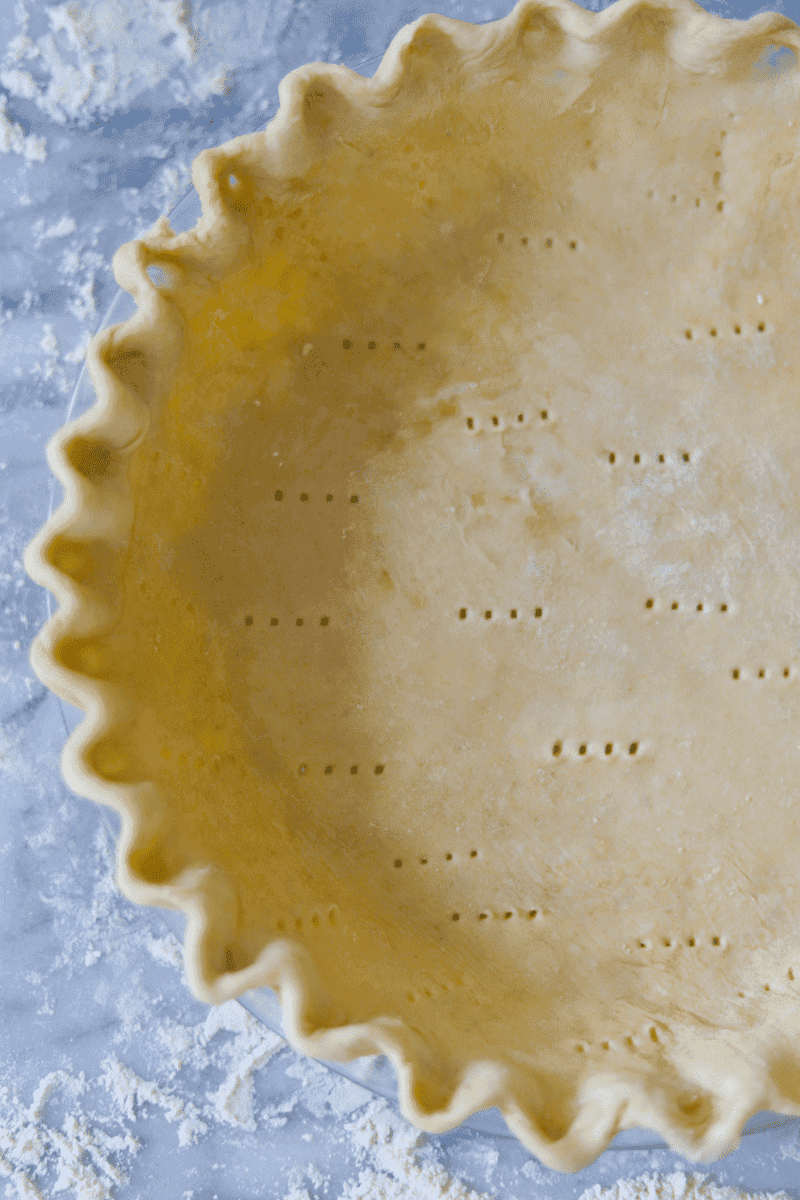
Step 7: Refrigerate the pie dough (again)
I know this is getting annoying but I promise you, you’ll want to let the pie shell get cold again. This prevents it from shrinking or warping while you bake it. I let my pie shell chill for another 45 minutes in the refrigerator before filling it or blind-baking, but some people stick it in the freezer for 15-20 minutes, which also works.
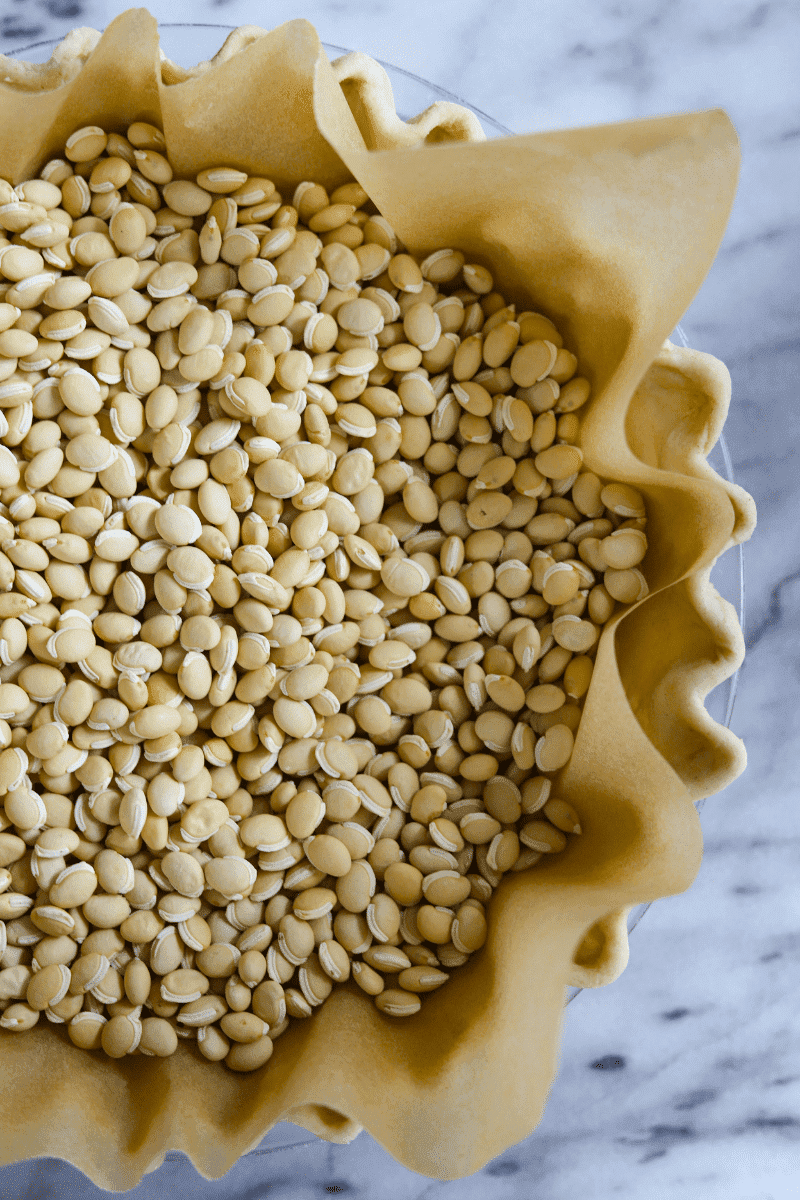
Step 8: Fill the pie and blind-bake if needed
If you’re not familiar with blind-baking, the photo below might look a little weird to you. Blind baking is when you fill your pie shell with weights (or in my case dried beans) and let it partially or fully bake before adding the filling. I have a whole lesson on blind baking here.
Generally, only single-crust, custard pies or no-bake pies require a blind bake. Your pie recipe should specify whether blind-baking is required.
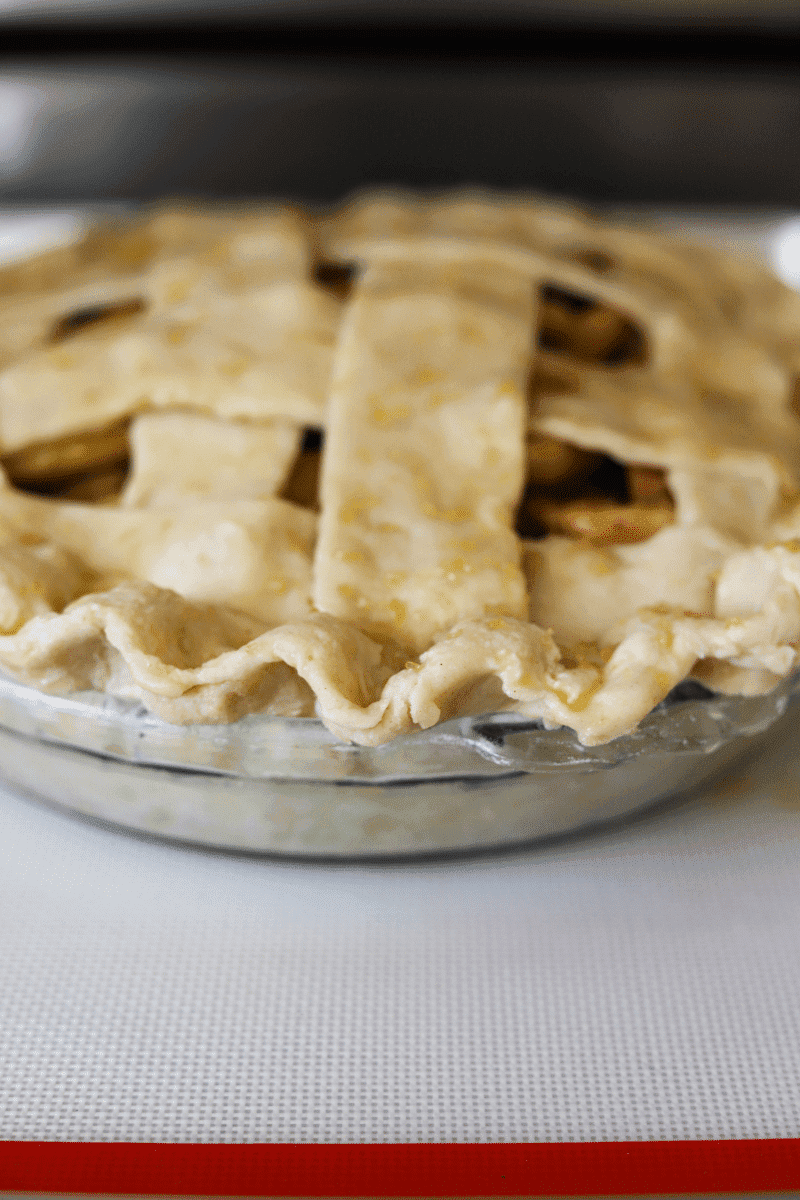
If your pie doesn’t require a blind bake, fill it with your pie filling, roll out your top crust and crimp the edges like I explained in step 6. The pie in the photo below is topped with lattice which is made by cutting your top-crust into 1-inch strips and weaving it. My apple pie recipe will explain how to do this.
I always brush my pie with egg wash (1 tablespoon of milk plus 1 egg yolk) prior to baking it so it develops a nice golden-brown color. Your pie recipe should give instructions on how to do this. Bake the pie according to the pie recipe that you’re using.
The final result
Brace yourself for the most tender, flaky and delicious golden-brown pie crust. I realize this recipe has a lot of steps, but if you follow them, this recipe is pretty much fool-proof. I’ve never messed up a pie crust that uses shortening! I can’t say the same for an all-butter crust!
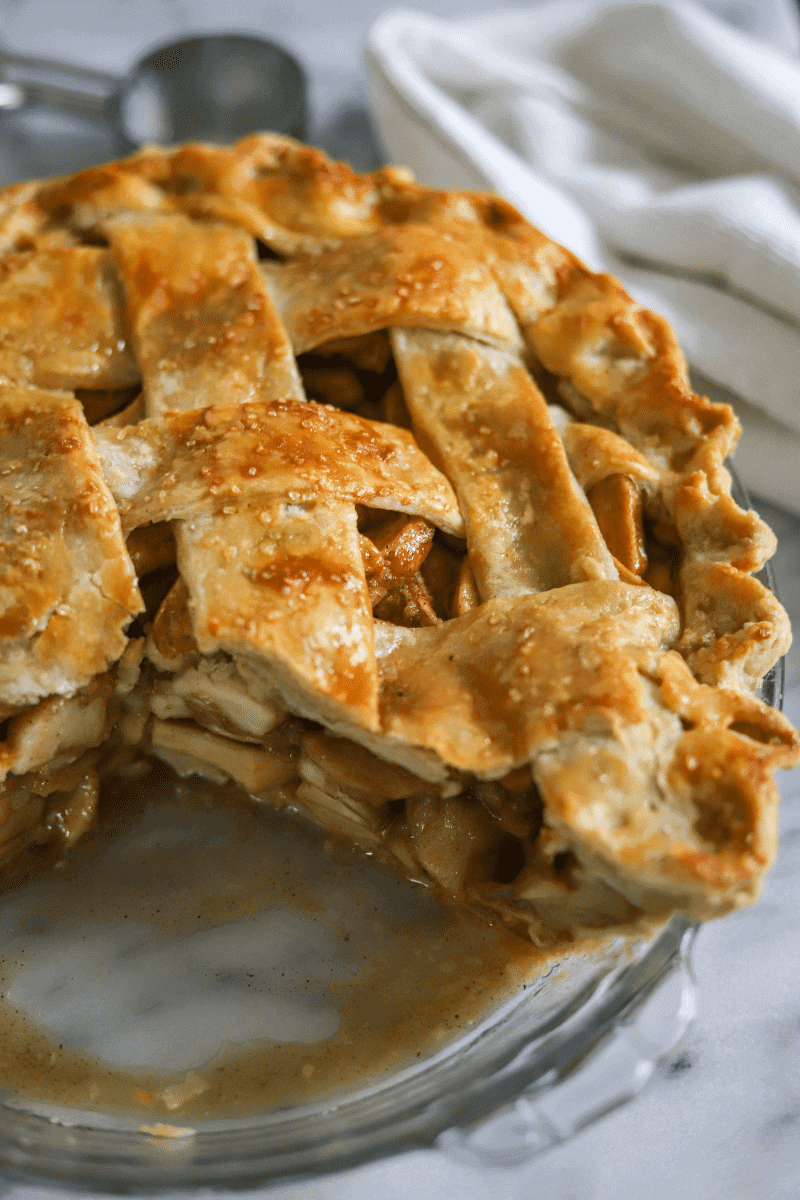
Here’s a peek at what this butter and shortening pie crust looks like! It slices so easily because of how tender and flaky it is! Stick with this recipe and I promise you’ll never be mad at pie crust again!

Tender Flaky Butter and Shortening Pie Crust
Ingredients
- 2 ½ cups of all-purpose flour
- 1 tablespoon of granulated sugar
- 1 teaspoon of salt
- 1 teaspoon of apple cider vinegar
- 8 tablespoons 1 stick butter, frozen
- ½ cup vegetable shortening chilled
- ½ cup of water plus 3 ice cubes
Instructions
- Combine the water, apple cider vinegar and ice cubes in a glass or spouted measuring cup. Mix and set aside.
- In a large mixing bowl, mix the flour, salt and sugar with a whisk.
- Grate the frozen butter and chilled shortening and add it to the dry mixture. Use a pastry cutter to cut the fat into the flour. The butter and shortening will become dry and crumbly.
- Adding a few tablespoons of ice-water at a time, start to work the dough into a ball using your hands.The dough should be moist enough where it sticks together but it shouldn’t be wet. Make sure to work quickly and not handle the dough for too long (you don’t want the butter to melt).
- Once the dough is formed into a ball, split it into halves and shape each half into a round disc (you will end up with 2 discs in total). Wrap each disc in plastic wrap. Refrigerate the dough for 2 hours.
- Once the dough has chilled, unwrap one or both discs (depending on your pie-recipe) and place on a generously floured surface. Flour your rolling pin and roll your dough out into a 12 or 13 inch circle (if you’re using 2 pie crusts, then keep the other one in the refrigerator and roll it out right before you top your pie). If your recipe only calls for 1 pie crust, you can keep the other half in the refrigerator for up to 5 days or freeze it for later use.
- Drape your rolled-out dough over your rolling pin and lay it over your pie plate. Ease the dough into the pie plate, trim any excess dough so that it extends about a ½-inch beyond the rim of the pie plate. Tuck the excess under and let the pie shell chill for 45 minutes in the refrigerator or 15-20 minutes in the freezer before filling it.
- For a single-pie crust: dock and flute your pie shell (see definitions in the notes below), and either fill it or blind-bake per your pie recipe's instructions. For a double-crust pie: fill the pie shell with filling, then roll out and top the pie with the other crust. Flute the edges and bake the pie according to the pie recipe.
Georgia says
I didn’t see a temperature for the oven and how long it bakes
Crystal DaCruz says
Hi Georgia, you would bake the pie crust according to your favorite pie recipe. Baking time depends on the type of pie and filling that you’re using. If you browse my other pie recipes, you’ll find the baking time/temperature in the recipe card.
Jerry Kelly says
My pie crust shrunk even though I had it in the fridge for over 45 minutes. I did not add “beans” or another filler when baking it. Would that cause it to shrink?