
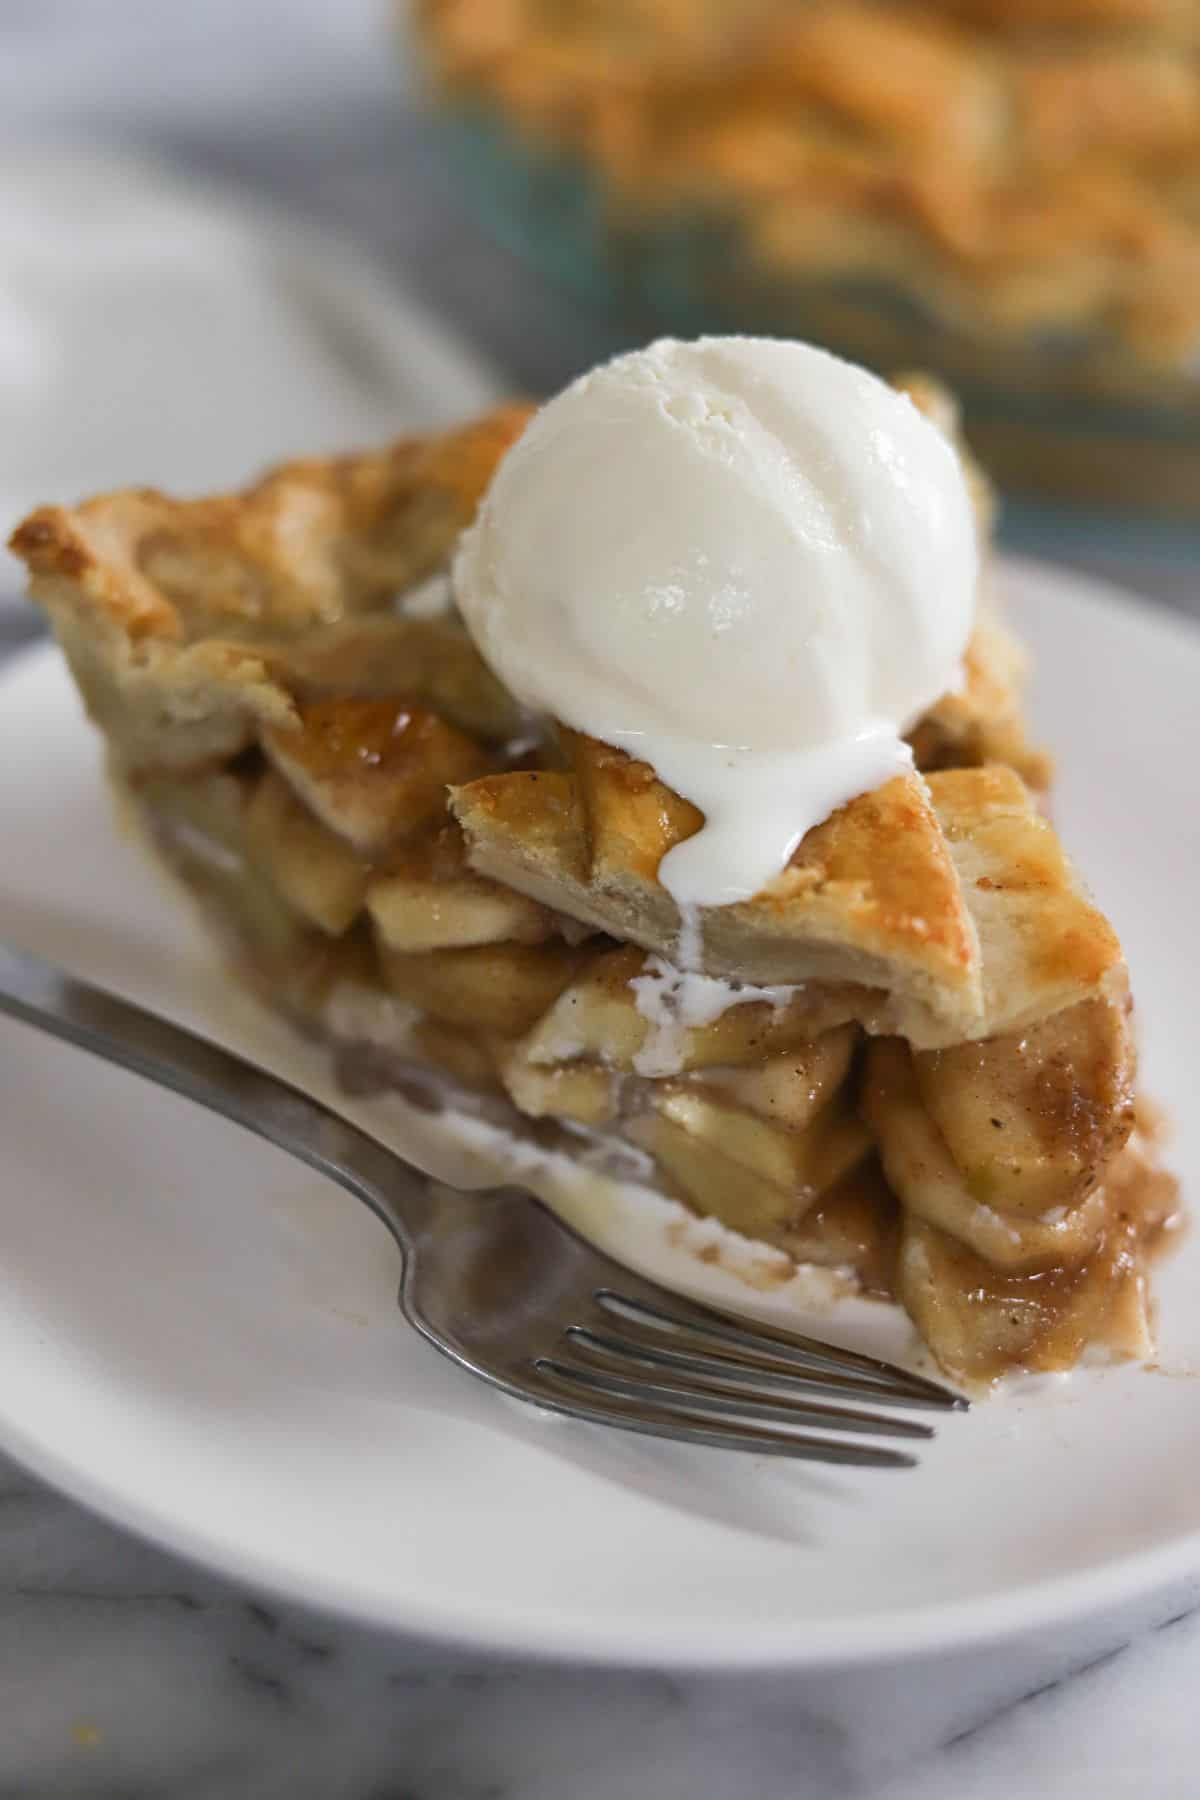
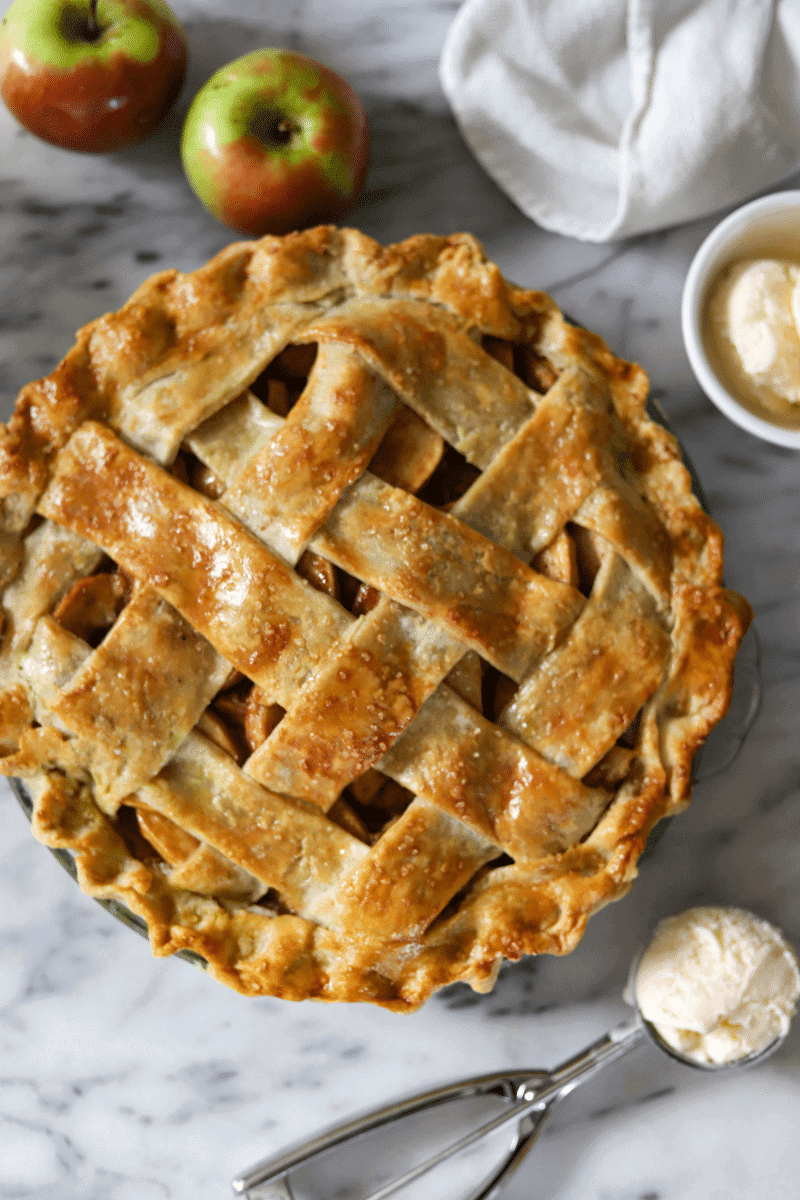
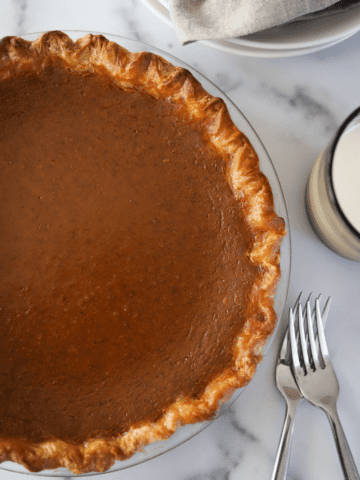
This apple pie à la mode has a sweet filling made from sliced apples, warm spices and a combination of sugars. It sits on a tender and flaky shortening crust and is topped with a scoop of vanilla ice cream.
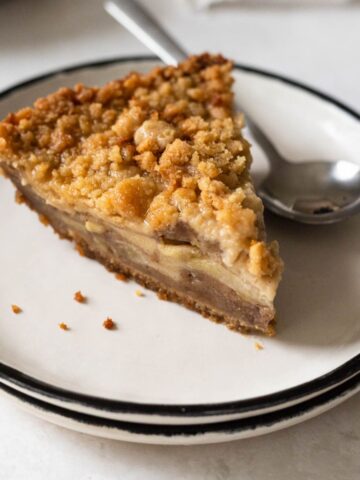
This is the only classic apple pie recipe you’ll ever need, but if you’re looking to switch things up, you’ll also love this dutch apple pie on a graham cracker crust.
Jump to:
❤️ Why you’ll love this recipe
- This is apple pie in its most basic, traditional form. It has a trio of classic fall spices -cinnamon, nutmeg and allspice. It’s sweet and tart, but not overloaded with sugar. The term à la mode might sound fancy, but it just means that it’s served with ice cream, which is optional of course.
- You can use just about any apple – I know some bakers are very specific about what kind of apples to use in pie, but I think any apple works well as long as it’s not too soft. Avoid red delicious and you’ll be fine. I offer some recommendations in the ingredient notes below.
- You can use a homemade or a store-bought crust. If you opt to make the crust from scratch, my shortening pie crust recipe is flaky and tender and pretty much no-fail. It’s easy enough for anyone to follow the recipe, even someone making it for the first time.
📋 Ingredient notes
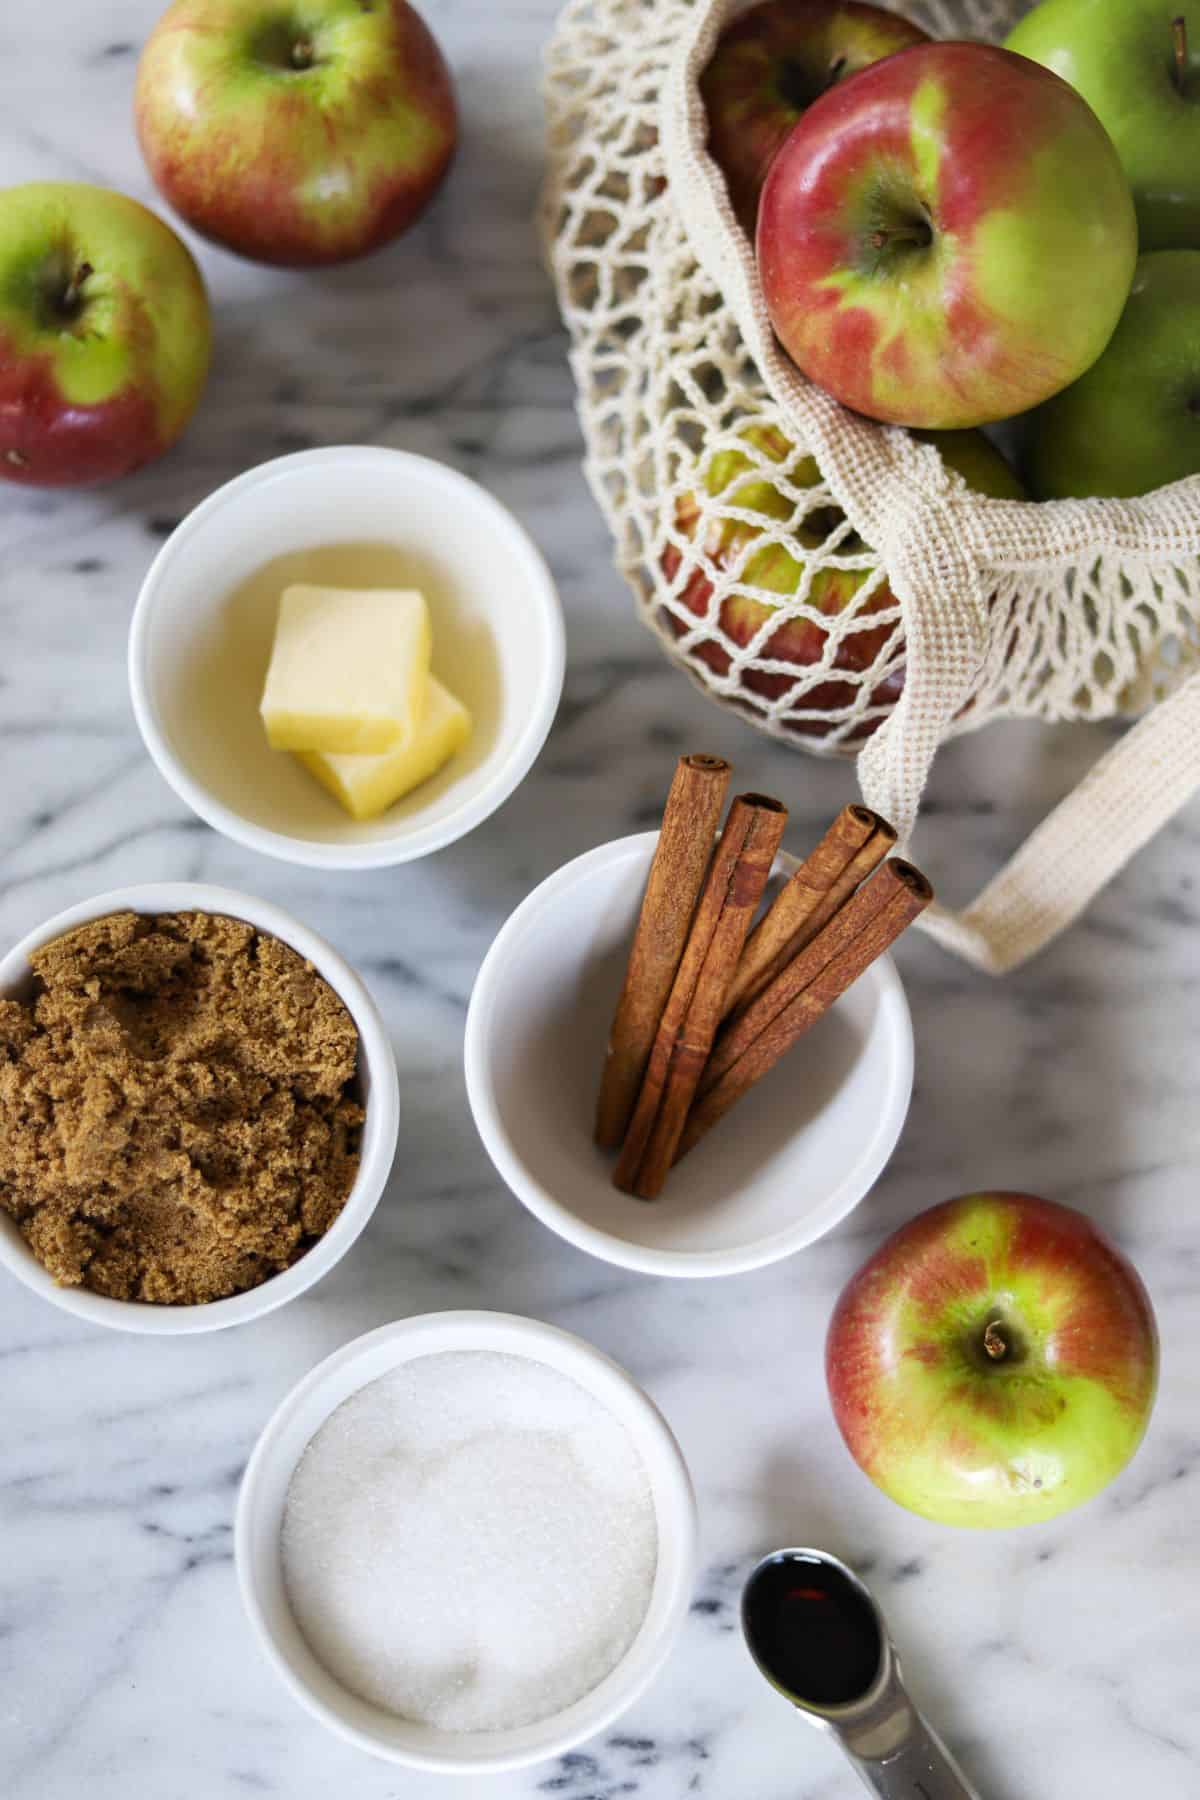
- 3 pounds of apples – my top 3 favorites are cortland, honeycrisp, and macoun apples. All of these varieties are both tart and sweet, although cortlands tend to be softer and a little sweeter. Macouns and honeycrisps are both firm, which some people prefer for baking.
- Combination of white and light brown sugar – this draws out the juices in the apples. The liquid is then cooked down, which ensures that the pie filling doesn’t get watery.
- Warm spices and vanilla extract – are added for flavor. I like to stick to basic spices for this recipe which are cinnamon, nutmeg and allspice.
- Double pie crust – you’ll need a bottom and a top crust. My shortening pie crust recipe yields 2 pie crusts.
- Vanilla ice cream – this the element that makes the pie à la mode!
🔪 Step-by-step directions
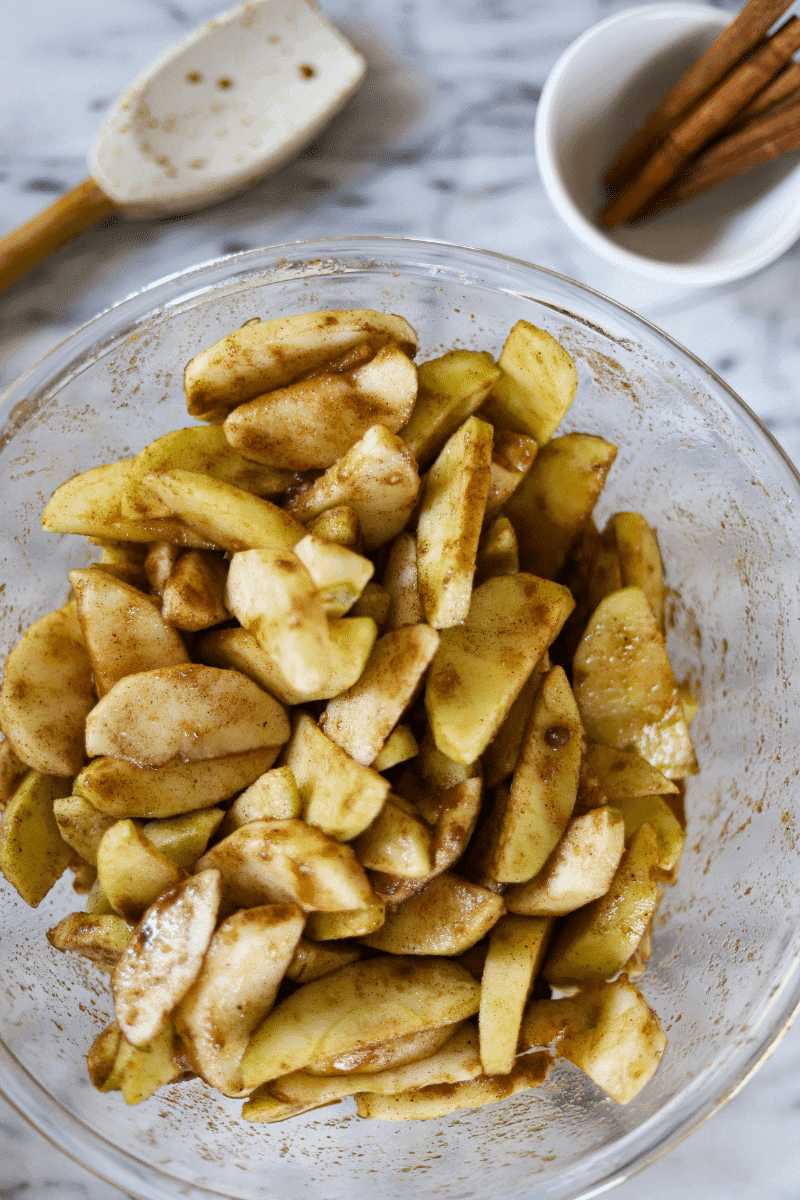
Step 1: Prep the apples by peeling, coring and cutting them apples into ¼ inch slices. Toss them in a bowl with granulated sugar, brown sugar, vanilla extract, salt and spices. Let the apples rest for 30 minutes to 1 hour.
Step 2: On a well-floured surface, roll out the bottom crust into a 12 inch circle. Drape the dough over your rolling pin and lay it over your pie plate. Gently ease the dough in. Let chill in the refrigerator while you finish prepping the apples.
Step 3: Drain the liquid from the apples, and put it (liquid only) in a small saucepan. Add the cubed butter and let the liquid simmer on medium/low heat for 10-15 minutes, stirring occasionally. Remove the cooked liquid from heat and set it aside.
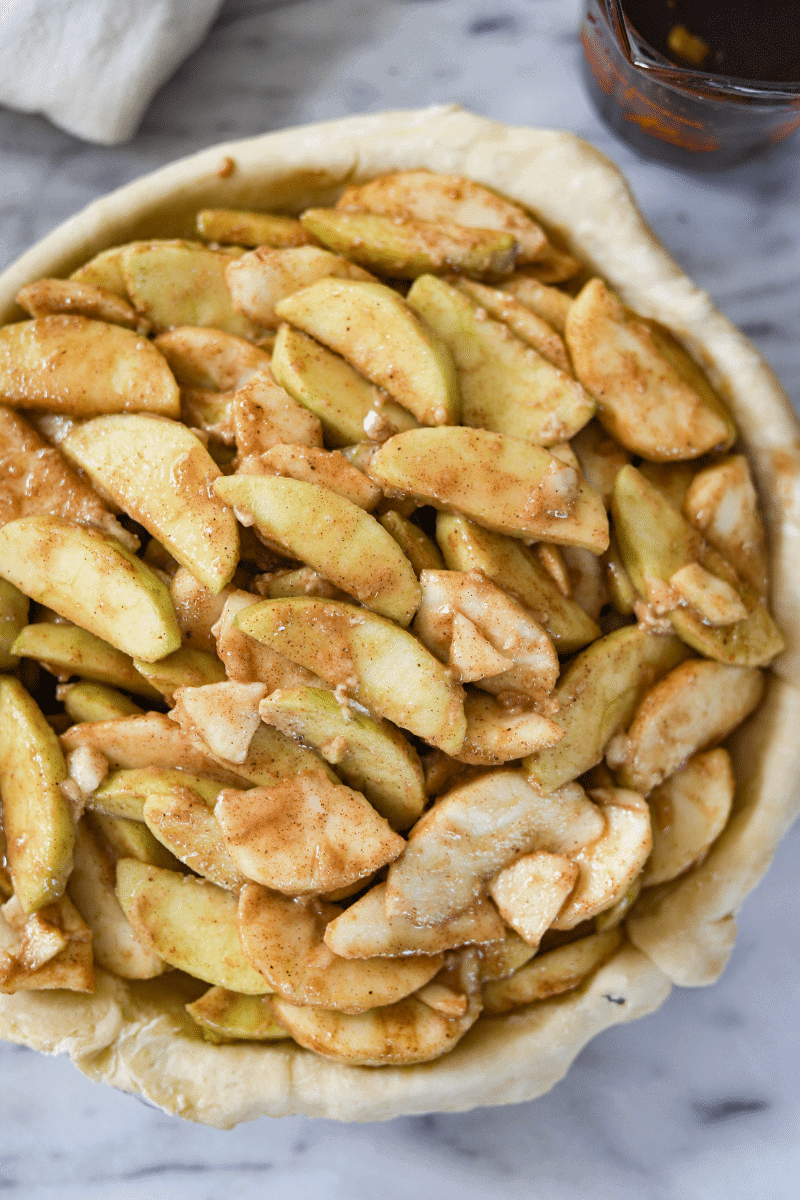
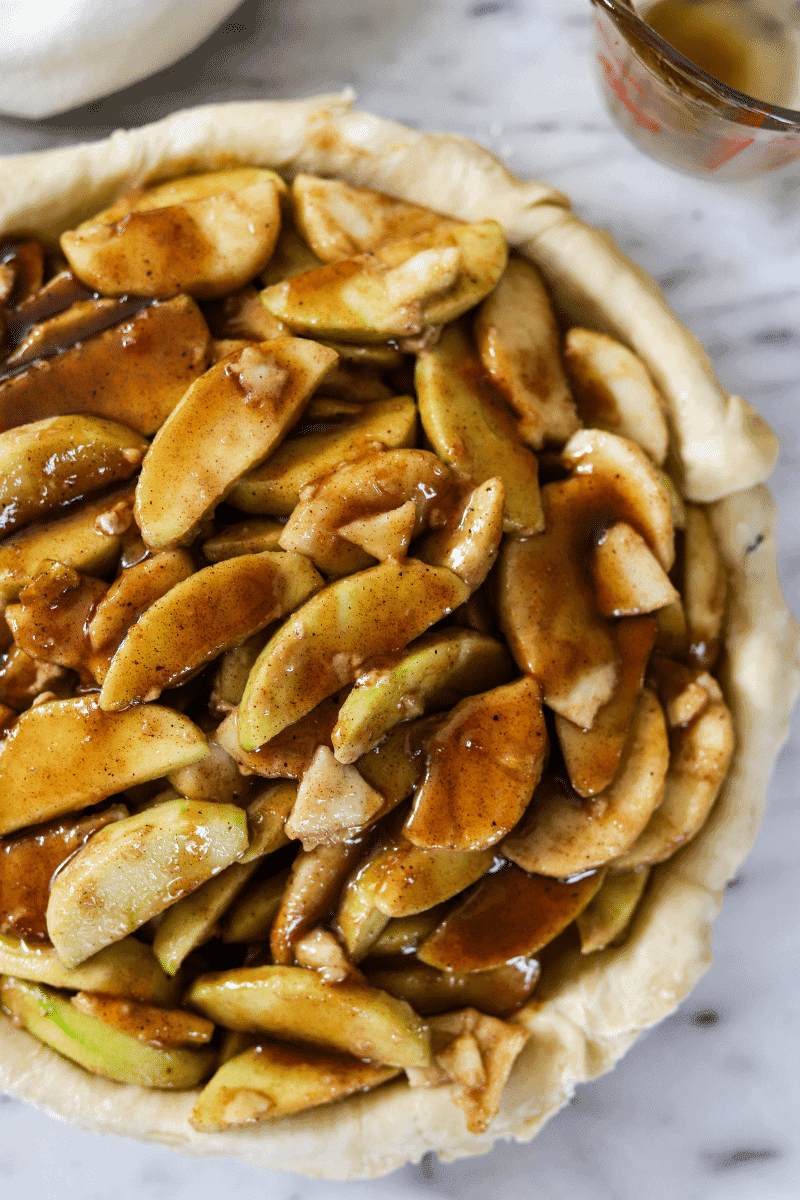
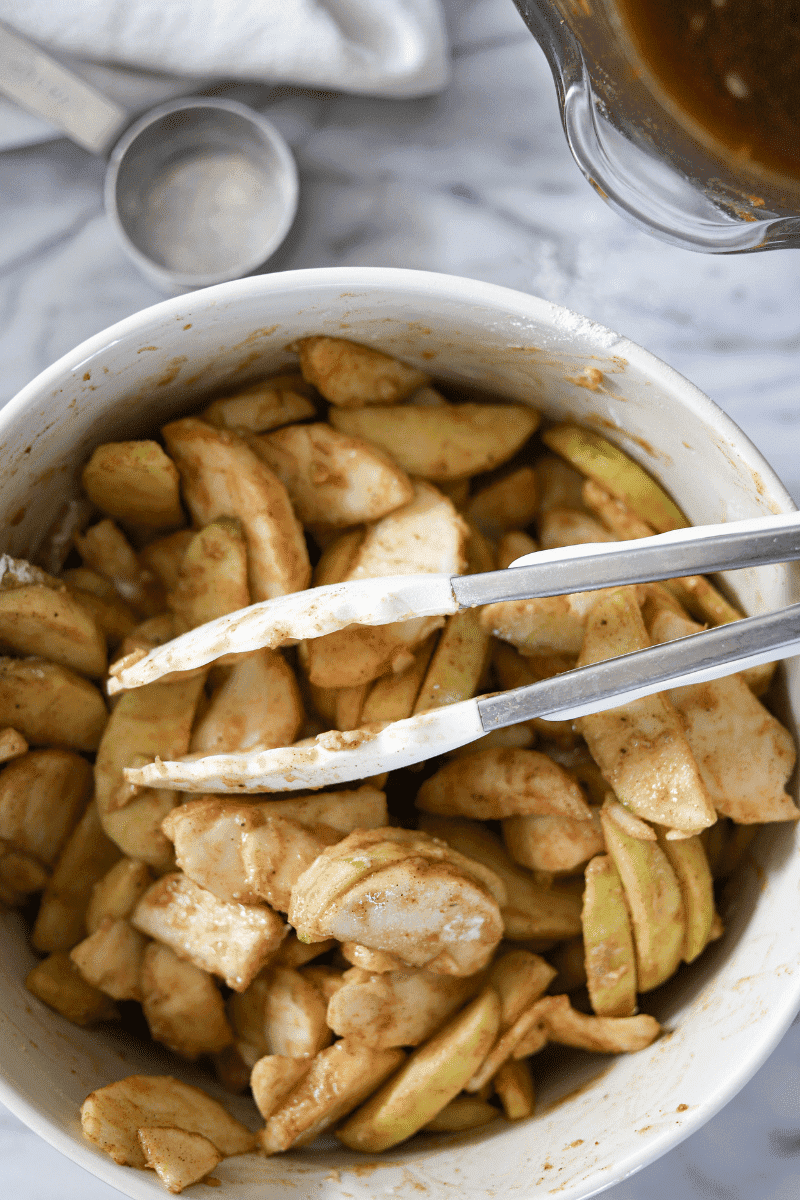
Step 4: Toss the apples in flour so they’re evenly coated. Remove the pie plate from the refrigerator and fill the pie plate with the apples. Pour the cooked liquid over the apples. and return the pie to the refrigerator.
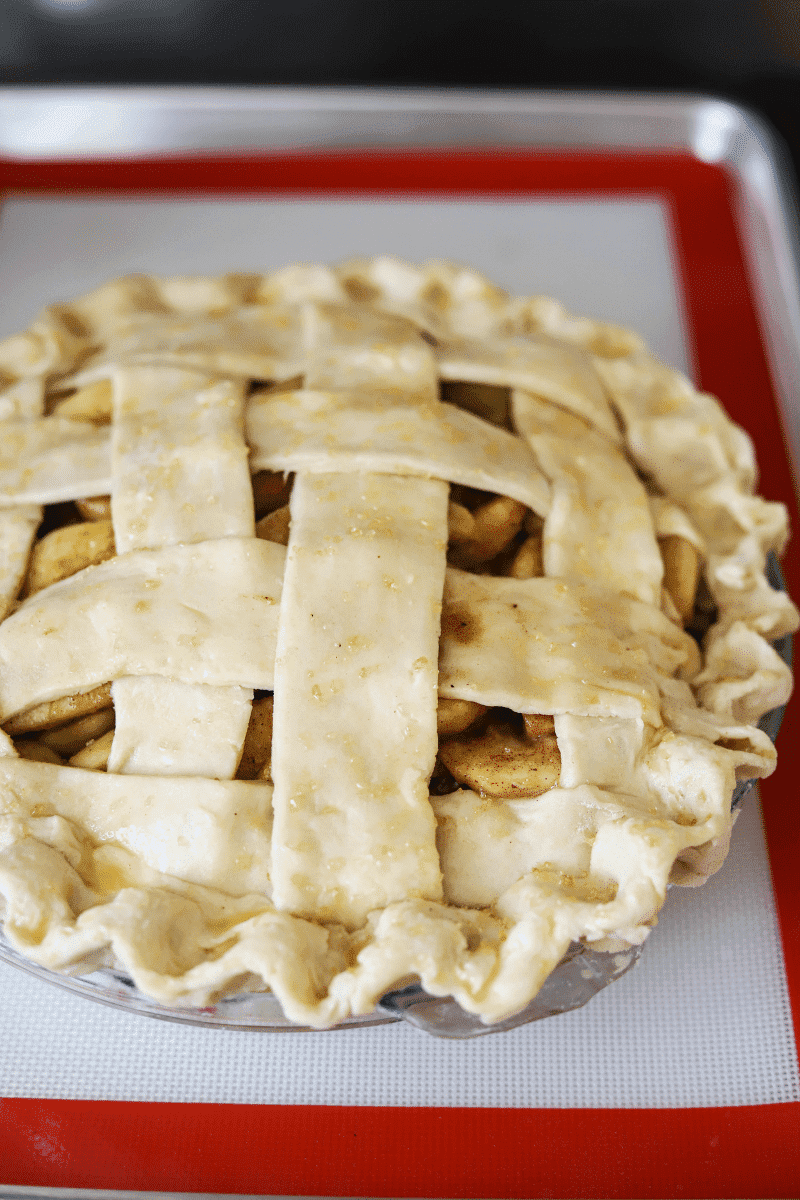
Step 5: Preheat your oven to 375°F and roll out the top crust into a 9-inch circle on a well-floured surface. At this point you can either cut the dough into long strips for a lattice crust or keep the entire top-crust in tact.
Lattice design steps:
- Cut the dough into about ten 1-inch strips.
- Lay 5 of the strips over the pie from top to bottom.
- Fold back every other strip, then lay a new strip running in a horizontal direction.
- Unfold the strips back to their original position, and then fold back the strips that are underneath the horizontal strip.
- Place a second horizontal strip across the pie and unfold the strips back to their original positions again. Repeat this process until there are no more strips and the lattice design is complete.
- Trim any overhang so that it extends ½ an inch past the edge of the pie plate. Fold the overhang up so that it covers the lattice edges.
If you’re not doing a lattice: keep the top crust in-tact and place it over the pie. Trim the dough ends so they extend a ½ inch past the rim of the pie plate. Fold any overhang under and vent the top of the pie by cutting a slit in the top.
Step 6: Flute the pie by placing your index finger on the rim of the pie plate, pointing outward. Pinch the dough around your forefinger using your opposite forefinger and thumb. Repeat this process around the perimeter of the pie plate to create a fluted edge.
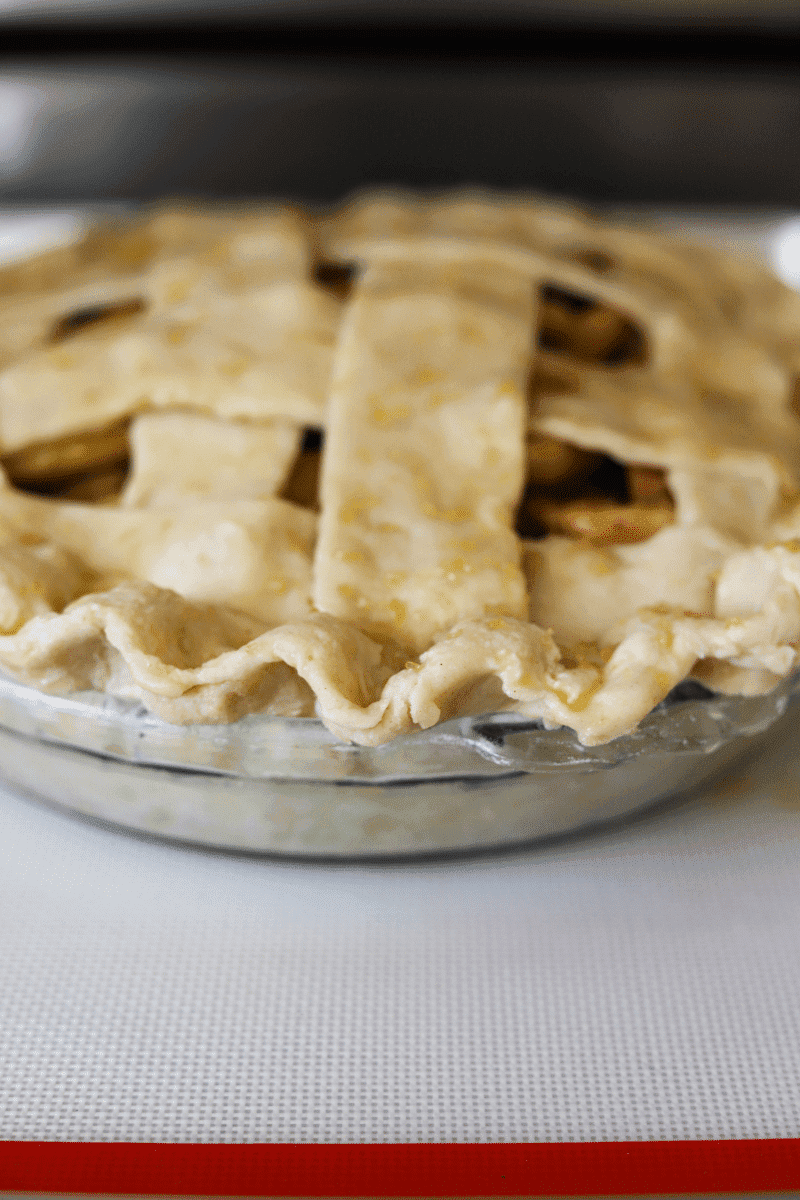
Step 7: Let the pie chill in the fridge or freezer for 15 minutes and prepare the egg wash by mixing one egg with a tablespoon of milk. Brush the egg wash over the top of the pie and around the edges. Sprinkle the top-crust with turbinado sugar
Step 8: Place the pie on a baking sheet and bake the pie for 1 hour. You shouldn’t have to cover the pie, but you can once the pie reaches your desired shade of golden brown. Brush the pie with egg wash around the 40 minute mark, and then again when there’s about 10-15 minutes remaining.
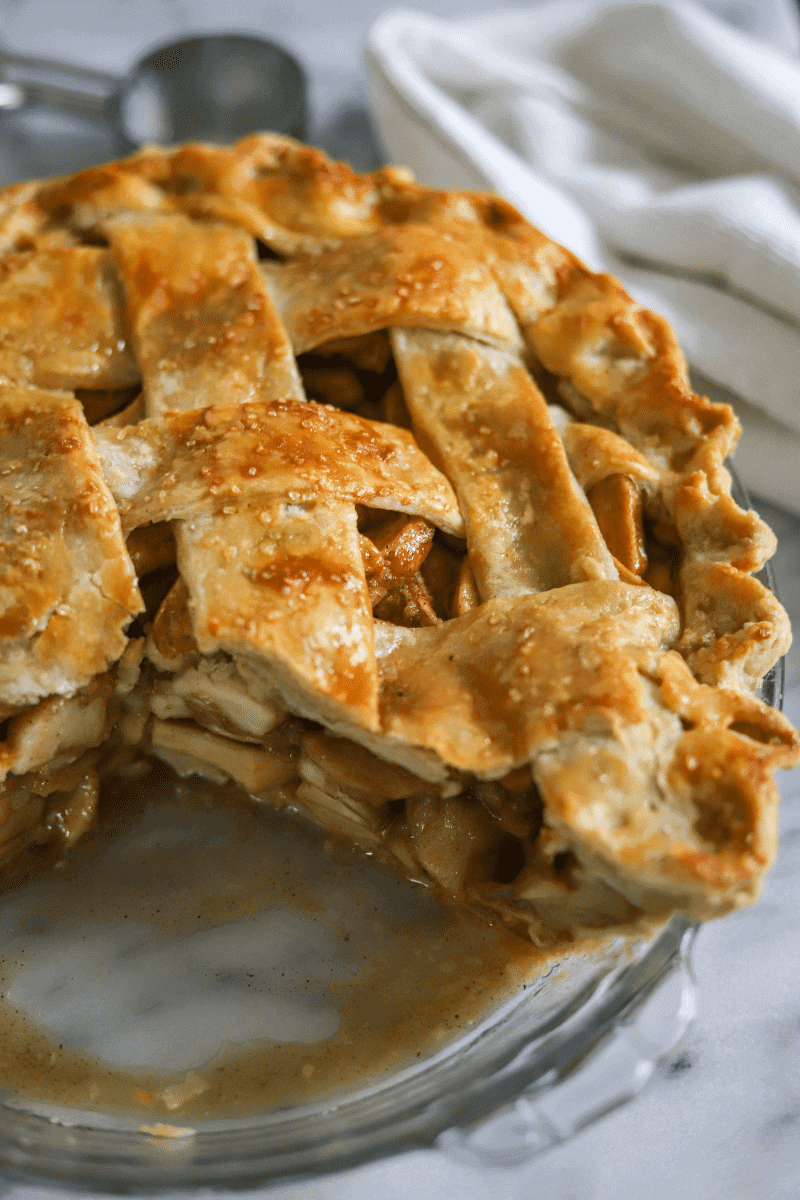
Step 9: Remove the pie from the oven and let it cool for 4 hours. This ensures that the pie filling sets, and doesn’t release too much liquid when you slice it.
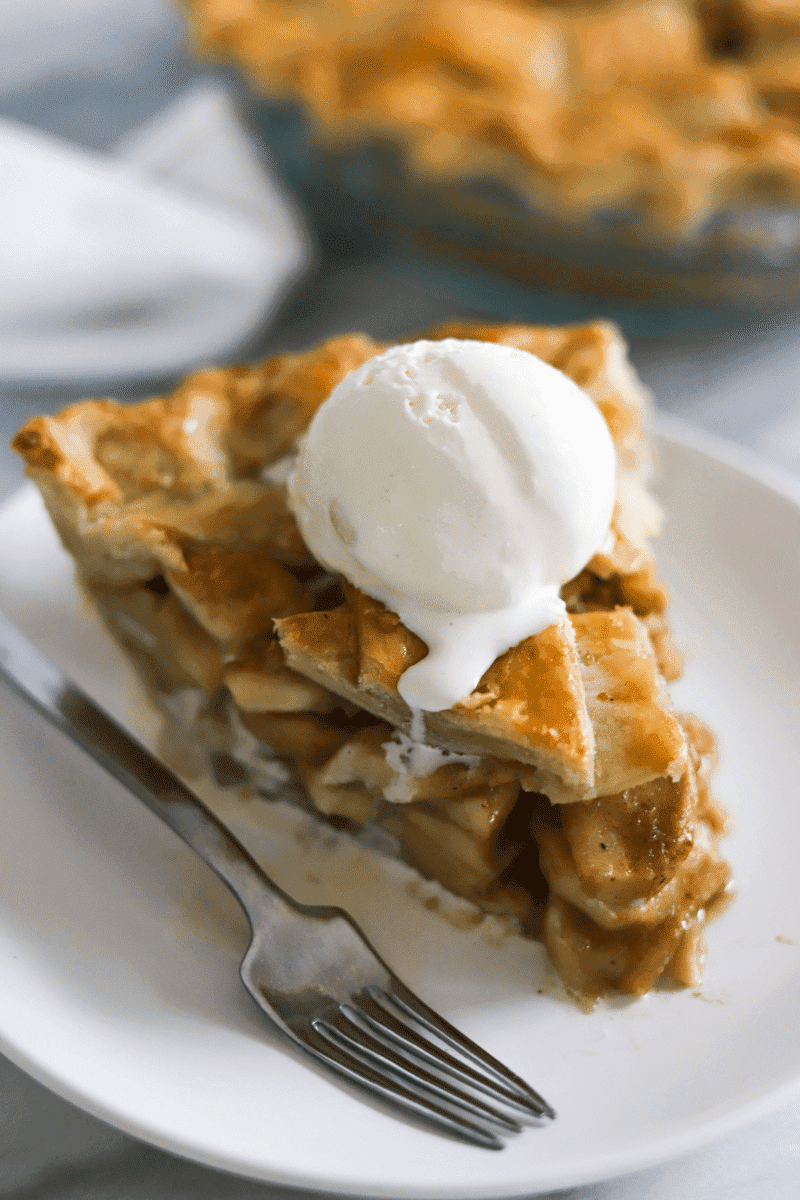
Step 10: Cut the pie into slices and top with a scoop of vanilla ice cream.
💭 Tips and tricks
- Draining and cooking the liquid prevents the filling from having too much liquid. It’s an extra step that adds about 30 minutes to the total time, but it’s worth it.
- Use egg wash to brush the crust so it turns golden brown. I usually bake my apple pie uncovered, but you can cover it with foil once it reaches your desired shade.
- Bake the pie on a baking sheet. This is especially important if you’re doing a lattice crust. It will catch any liquid that seeps out. A silicone baking mat will help keep the pie in place.
- Let the pie cool entirely! Everyone loves warm pie but it’s important to let it cool properly (4 hours minimum) so that the apple filling sets. You can heat it up right before serving it.
⭐ Other recipes you’ll love

Classic Apple Pie Recipe
Ingredients
Pie Filling
- 3 pounds apples macoun, honeycrisp or cortland are my favorites
- ½ cup brown sugar light or dark
- ½ cup granulated sugar
- 2 teaspoons vanilla extract
- ⅓ cup all-purpose flour
- 1 teaspoon salt
- 2 teaspoons ground cinnamon
- 1 teaspoon ground nutmeg
- ½ teaspoon allspice
- 2 tablespoons unsalted butter cut into cubes
Other Ingredients
- 9 inch double pie crust
- egg wash 1 tablespoon of milk + 1 egg
- 1 tablespoon of turbinado sugar optional
- vanilla ice cream for serving
Instructions
- Prep your apples by peeling, coring and cutting the apples into ¼ inch slices. Toss them in a bowl with granulated sugar, brown sugar, vanilla extract, salt and spices. Let the apples rest for 30 minutes to 1 hour.
- Roll out the bottom crust into a 12 inch circle on a well floured surface. Drape the dough over your rolling pin and lay it over your pie plate. Gently ease the dough in. Let it chill in the refrigerator while you finish prepping the apples.
- Drain and cook the juices from the apples. Drain the juice from the apples, and put it in a small saucepan. Add the cubed butter and let the liquid simmer on medium/low heat for 10-15 minutes, stirring occasionally. Remove the cooked liquid from heat and set it aside.
- Prepare the filling: toss the apples in flour so they're evenly coated. Remove the pie plate from the refrigerator and fill the pie plate with the apples. Pour the cooked liquid over the apples. Place the pie plate back in the refrigerator and remove the dough for your top pie crust.
- Roll out the top crust: into a 9-inch circle on a well-floured surface. At this point you can either cut the dough into long strips for a lattice crust or keep the entire top-crust in tact. Lattice design: cut the dough into about ten 1-inch strips. Lay 5 of the strips over the pie from top to bottom. Fold back every other strip, then lay a new strip running in a horizontal direction. Unfold the strips back to their original position, and then fold back the strips that are underneath the horizontal strip. Place a second horizontal strip across the pie and unfold the strips back to their original positions again. Repeat this process until there are no more strips and the lattice design is complete. Trim any overhang so that it extends ½ an inch past the edge of the pie plate. Fold the overhang up so that it covers the lattice edges.If you're not doing a lattice: keep the top crust in-tact and place it over the pie. Trim the dough ends so they extend a ½ inch past the rim of the pie plate. Fold any overhang under and vent the top of the pie by cutting a slit in the top.
- Seal the pie: place your index finger on the rim of the pie plate, pointing outward. Pinch the dough around your forefinger using your opposite forefinger and thumb. Repeat this process around the perimeter of the pie plate to create a fluted edge. You can also use the tines of a fork to seal the pie crust edges. Let the pie chill in the freezer for 15 minutes (this will prevent the dough from shrinking).
- Pre-heat oven to 375°F and prepare the egg-wash by mixing one egg with a tablespoon of milk. Brush the egg wash over the top of the pie and around the edges. Sprinkle the top-crust with turbinado sugar (optional). Place the pie on a baking sheet (line the baking sheet with a pastry mat if you have one).
- Bake the pie for 1 hour. You shouldn't have to cover the pie, but you can once the pie reaches your desired shade of golden brown. Brush the pie with egg wash around the 40 minute mark, and then again when there's about 10-15 minutes remaining.
- Remove the pie from the oven and let cool completely on a cooling rack. The pie needs to cool for 4 full hours. This ensures that the pie filling sets, and doesn't release too much liquid when you slice it.
- Cut the pie into slices and top with a scoop of vanilla ice cream.
Robin says
Thank you for the tip of adding milk to my egg wash! I love the golden brown color it imparts.
Tamara says
I absolutely LOVE apple pie. This recipe was super easy to follow, and the pie turned out so delicious. Can’t wait to make it again- because my house smells so amazing!
Samiah Nicole says
This apple pie was definitely one of the most delicious apple pies I’ve ever made or eaten!! So, so good!
Marta says
Before baking this recipe, I had only used Granny Smiths to make my apple pies. This was even better than I thought it could be. Definitely an addition to the holiday dinner table.
Anna Garza says
What apples did you end up using instead of the Granny Smith apples because thats all I use as well?
Crystal DaCruz says
Hi Anna!
You can use cortland or honeycrisp! Cortland is what is shown in the photo.
Barry J. says
I’ve never attempted to make an apple pie before, but this recipe just changed my mind. I love how you provide different varieties of apples to use and I think I’m going to try the Golden Delicious apples. I’m really looking forward to making this!
Capri says
I couldn’t wait to make this apple pie!! When you teased us by posting the ingredients to Instagram, I went out and brought them! I was even happier when you shared the final result: this gorgeous, perfectly baked apple pie. I made this recipe yesterday for dessert after brunch with my family. There was not a crumb left! Thank you for the recipe.
Chenée says
I love apple pie à la mode, and this recipe was everything apple pie should be! Thanks for the tips on making a lattice crust! Mine came out fantastic!
Britney says
The best apple I’ve ever made! This was my first time using Cortland apples and it really made a difference in the texture. I loved it!
Taneisha says
I saw this recipe on your Instagram page, and I knew I had to make it! The instructions were so perfect, and it turned out amazing! Thank you so much!
Jazz says
This pie baked up so nicely for me. Used a mix of Honeycrisp, Granny Smith, and Golden Delicious apples!
Immaculate Ruému says
I love this apple pie so much and cannot wait to make it again. It made my flat smell nice and the taste was perfect!
Alyx Hildreth says
Hi there! I’m planning to make my first apple pie — this recipe — for Thanksgiving! If I use store-bought crust, which brand do you recommend? Or any specifics here? Thank you!
Xoxo