
I swear, every Cape Verdean family that I know has their go-to pudim expert. This is person’s pudim is always consistent. You gotta earn your stripes to be the trusted pudim machine. No one likes bad pudim!
Make sure you also check out my version of pudim made with doce de leite!
Pudim looks a lot like flan, what’s the difference?
Absolutely no difference. Just goes by a different name depending on what country you’re from. Portuguese-speaking countries like Cape Verde, Portugal and Brazil call it pudim. Spain, Latin America and the Phillipines refer to it as flan.
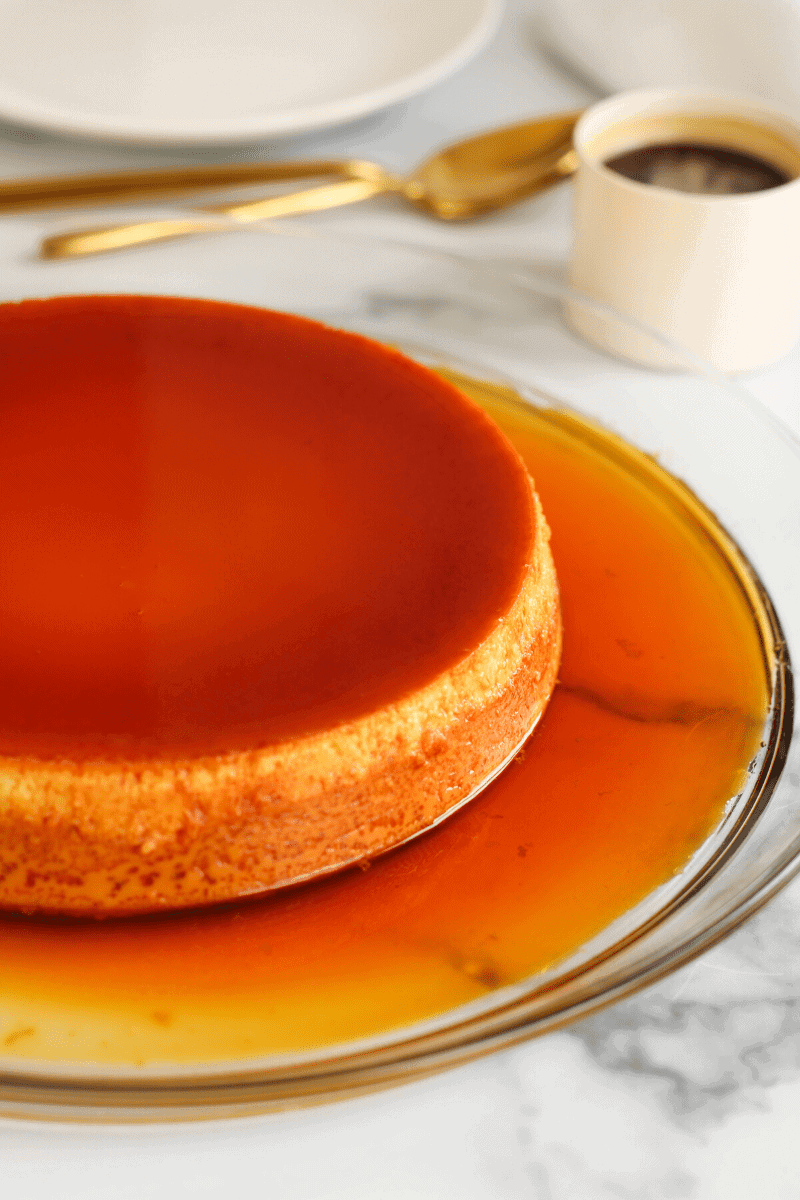
It’s the same luscious custard that’s traditionally made of sweetened condensed milk, eggs and evaporated milk. You can use coconut milk or go the more traditional route, and use evaporated milk for this Cape Verdean pudim recipe.
If it’s made with coconut milk, why don’t you call it pudim d’coco (coconut pudim)?
So I actually went back and forth quite a bit on what I wanted to title this recipe. I feel like someone searching for ‘coconut pudim’ is probably looking for a recipe with a distinct coconut taste or one that uses shredded coconut.
For this recipe though, the coconut flavor is very, very subtle and I don’t use shredded coconut at all. I use coconut milk more for the texture than for the taste. Again, you can always use evaporated milk in place of coconut milk.
Is pudim easy to make?
Yes! Super easy, but you also need to follow the instructions closely! The most difficult part for me was getting the caramel syrup to reach a golden, amber color without burning it. My first few times, I didn’t caramelize the sugar enough out of fear that it would burn.
The result was an overly sweet pudim, with liquidy caramel, that was very pale in color. I eventually got it right and made sure to document the steps precisely to get that rich beautiful caramel color!
Does pudim contain raw eggs?
No. Normally, I don’t shy away from recipes that use raw eggs, but with pudim (or flan) the eggs are fully cooked. Pudim is baked in a water bath in the oven, which ensures that the eggs cook thoroughly and evenly. No risk of food-borne illness here!
Here are a few tips on how to achieve perfect pudim!
1. Don’t rush the caramelizing process! This step is super-important, because if you don’t let the sugar liquefy and caramelize fully, you won’t get a rich, beautiful amber color, and the texture of your syrup will be off.
2. Low and slow is the name of the game! Your sugar needs to be caramelized over medium-low heat so it doesn’t burn. Caramelizing the sugar takes about 15 minutes. You also don’t want to bake your pudim at too high of a temperature. I bake mine at 350 degrees F, but some people bake it at 325 degrees.
3. Cover your water bath. Pudim is baked in a pan that’s placed in a larger pan that’s filled with hot or boiling water. I like to cover the larger, outer pan with foil so that the steam is contained and the pudim cooks evenly throughout. I tried baking it uncovered once and it took forever and browned too quickly.
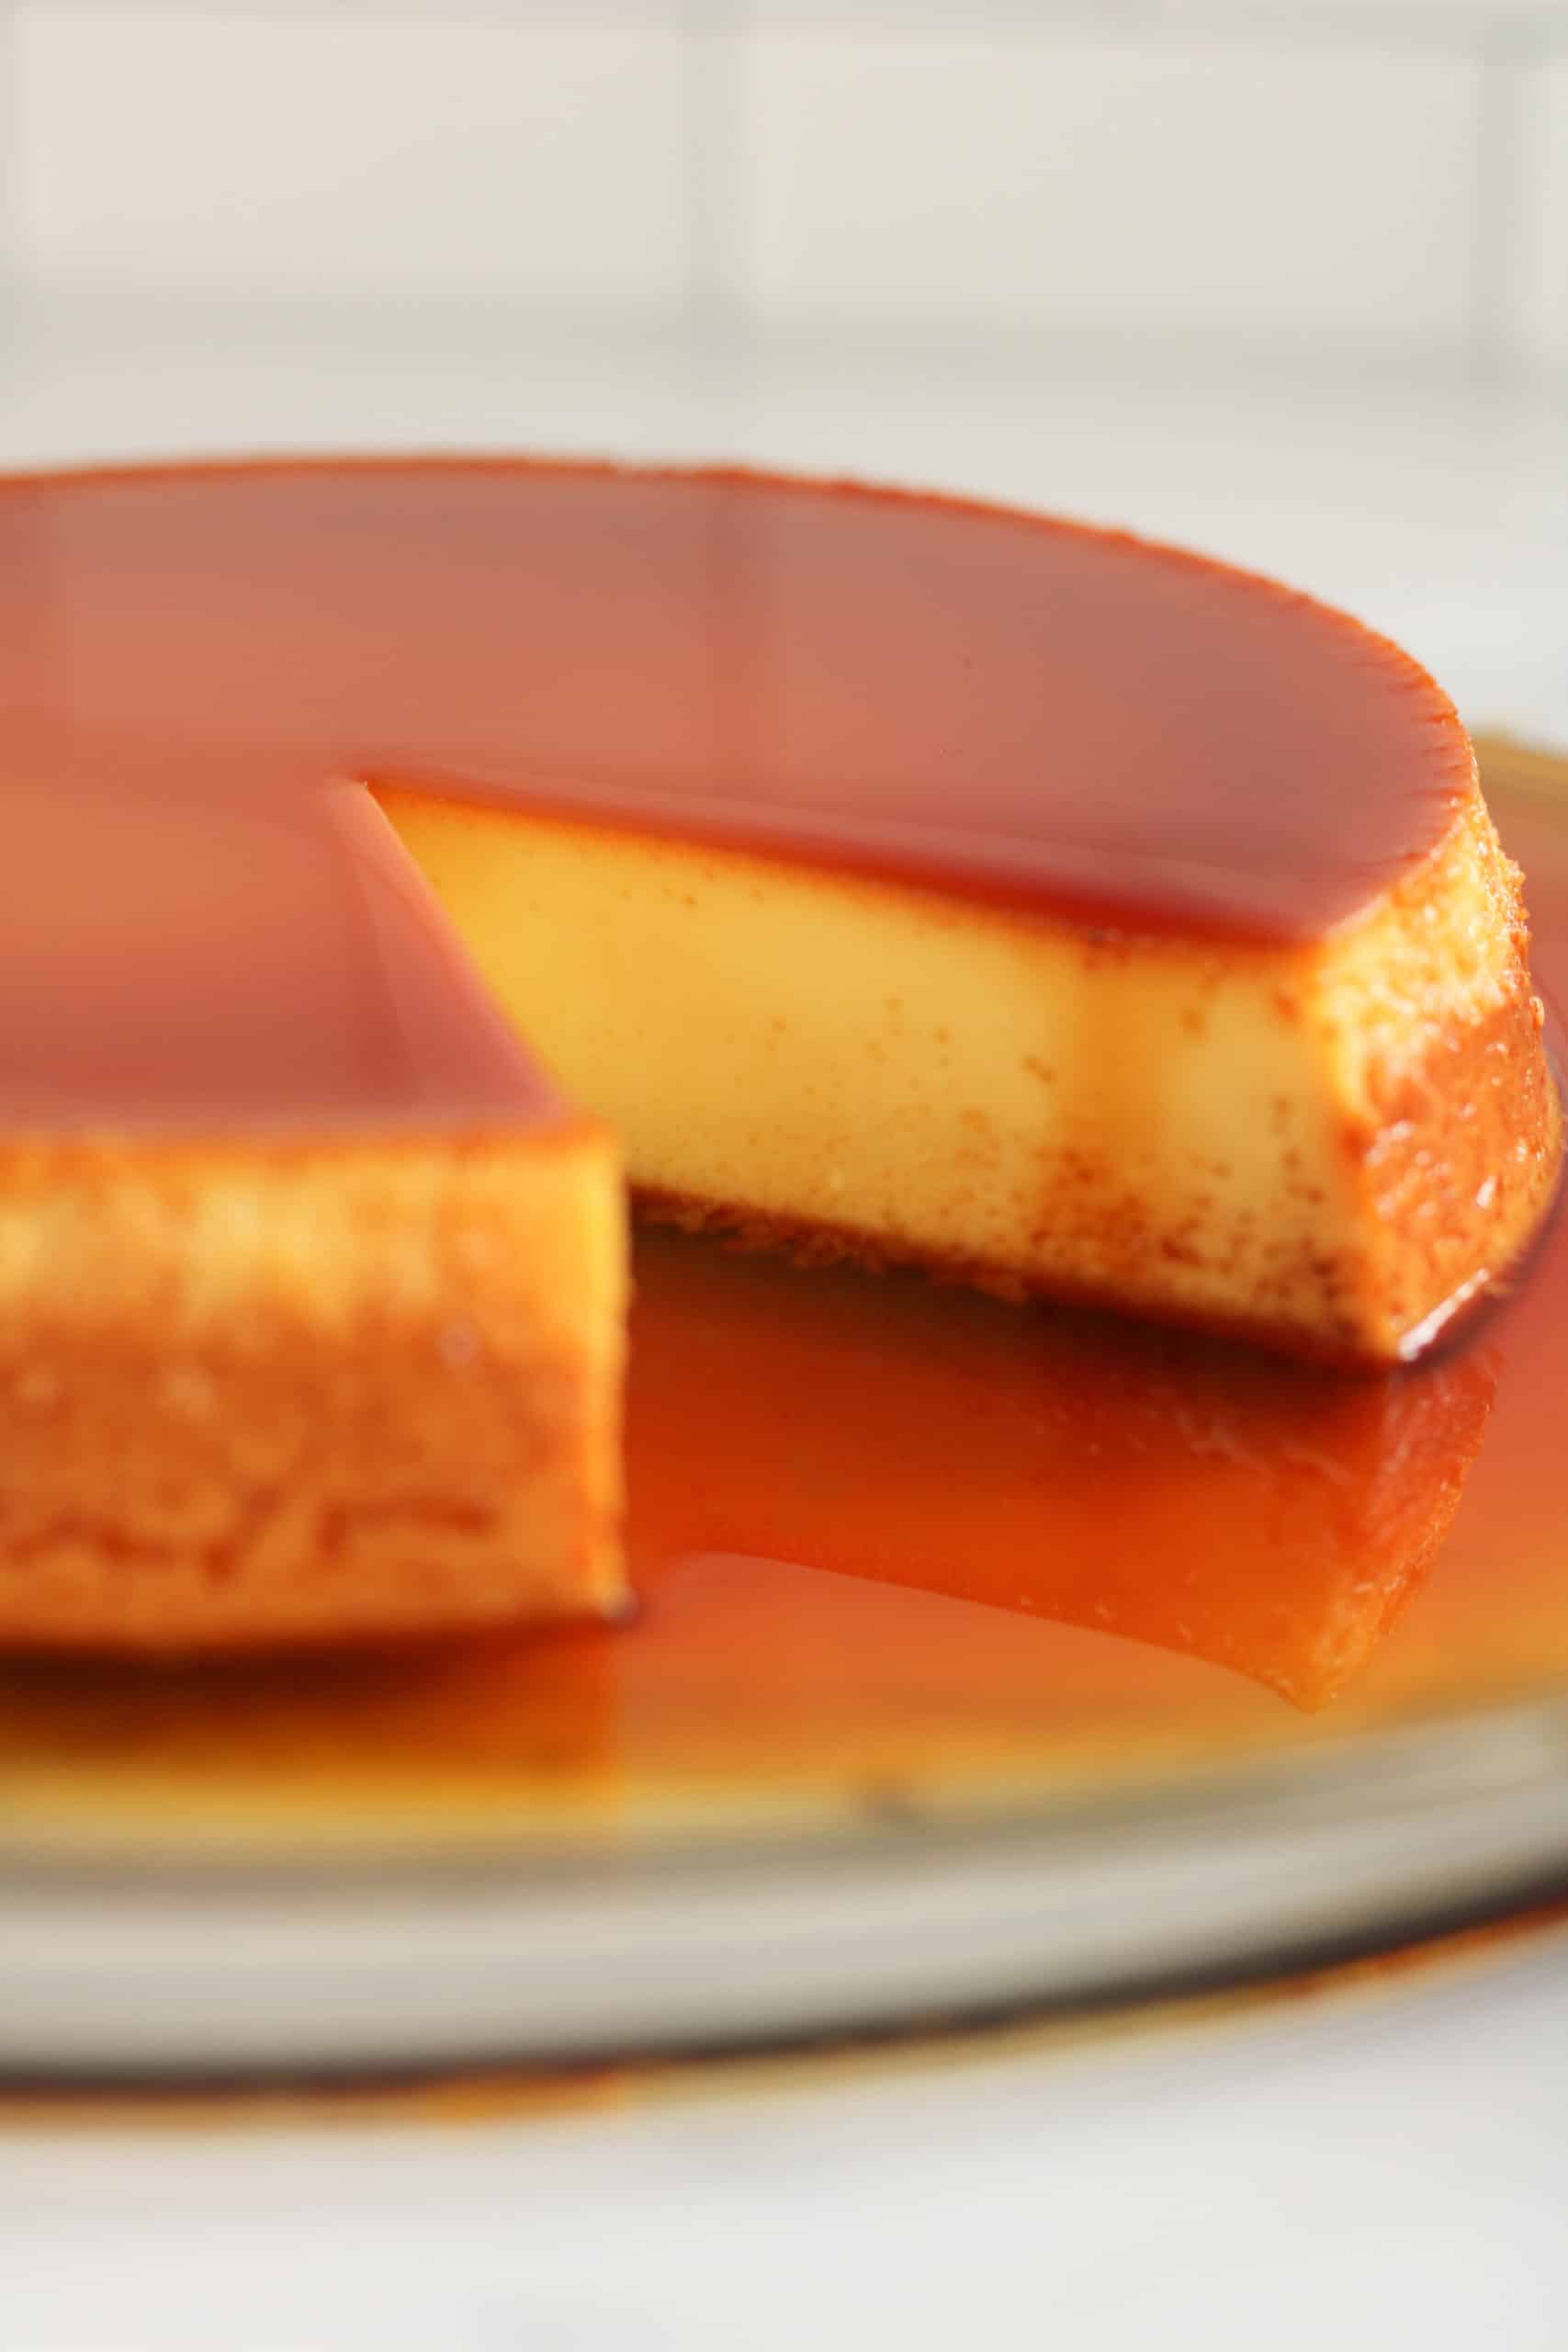
4. You’ll know when the pudim is done baking by looking at it. If you follow my instructions to a T, then you’ll get perfectly baked pudim every time. When you remove it from the oven, it should jiggle slightly but the center should be fully set and not look liquid-y. The uncovered side should slightly resemble the color and texture of an omelette. Don’t worry, the center and bottom sides will be smooth and creamy when you flip it over and cut into it.
5. Let it cool fully! This is probably the single most important step! Pudim isn’t meant to be served warm! If you try to invert the pudim before it’s cooled fully, it’ll break and you’ll regret it. Don’t let your efforts go to waste by being impatient!
6. Make it in advance! If I know I’ll be making pudim, or need it for a party or an event, I always make it the day before so it has plenty of time to cool. It’s one of those desserts that keeps really well and is intended to cool overnight (or 4 hours at the very least) in its pan in the refrigerator.
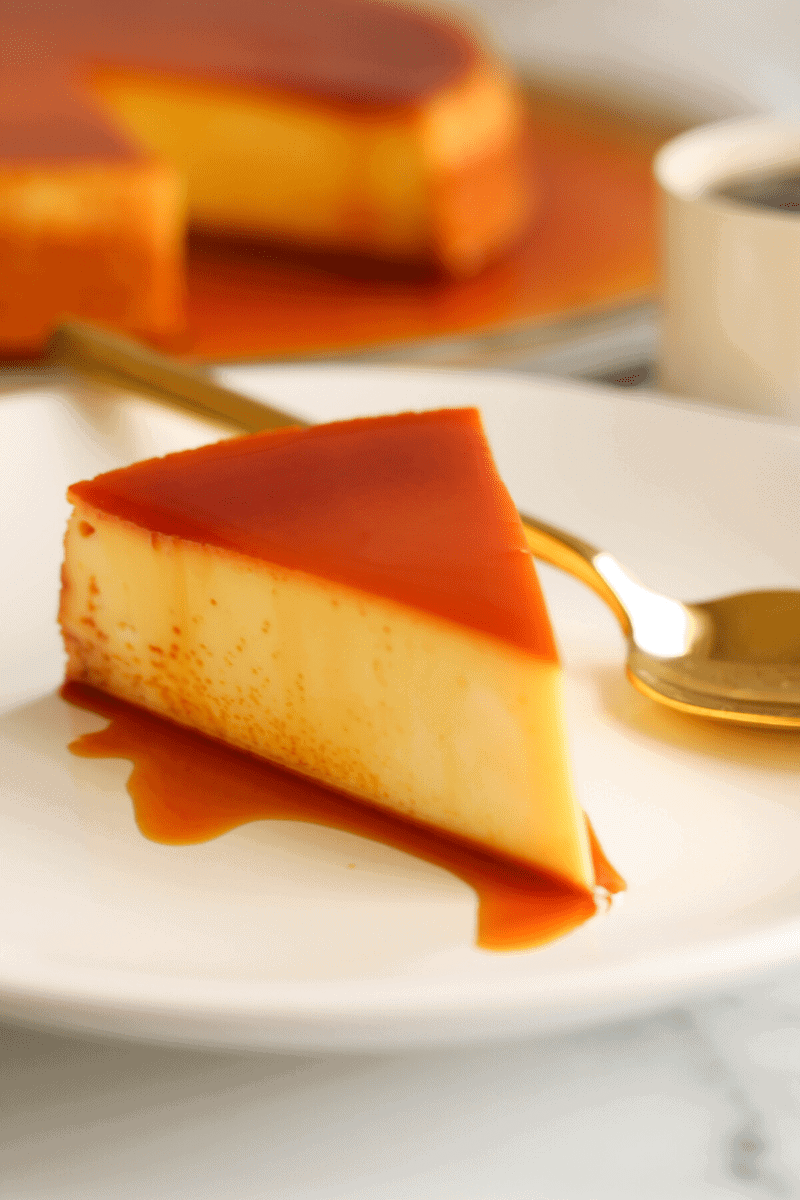
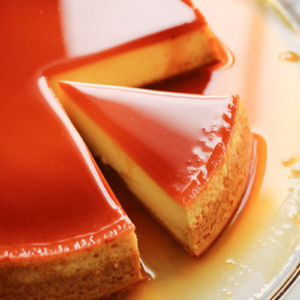
7. Use a sharp knife to cut it! You should use a butter knife to run along the edges before inverting it, but to actually serve and slice it, use a sharp knife. You’ll get cleaner slices.
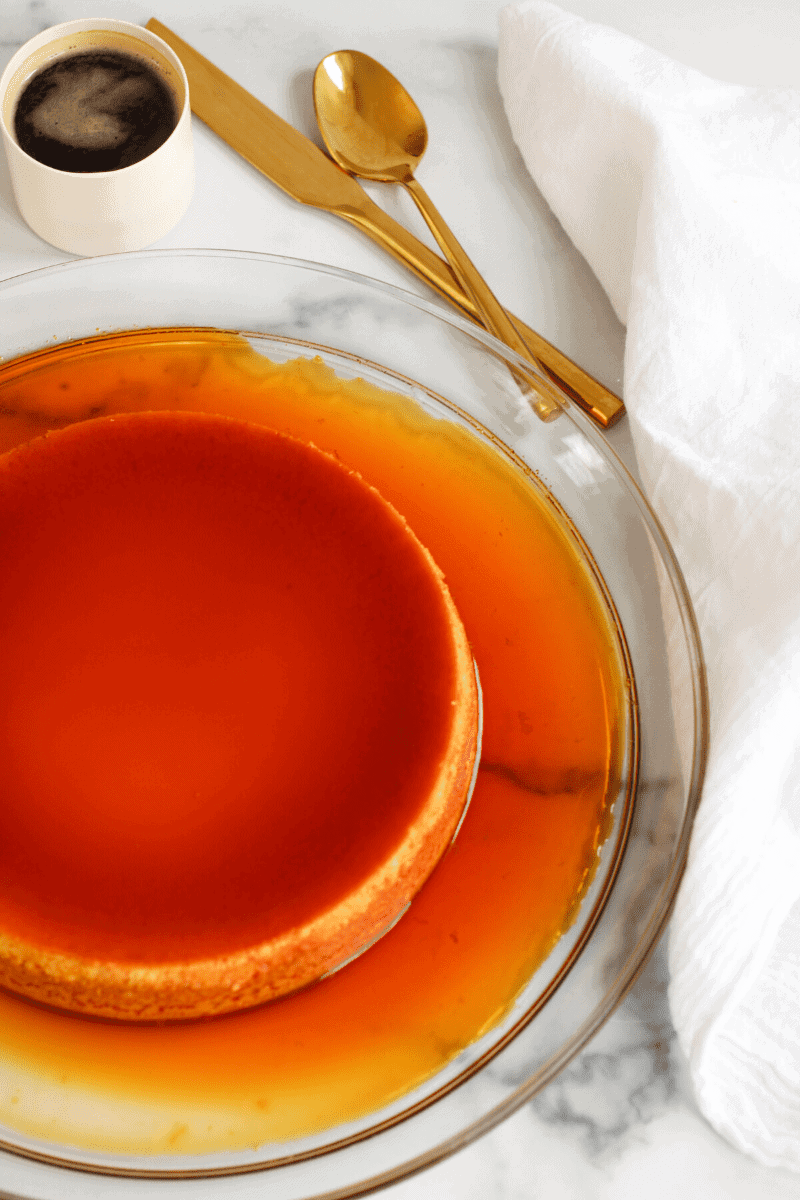
8. No caramel left behind! Try to extract as much caramel syrup as you can from the pan! The caramel is just as important as the pudim! There’ll be a layer of hardened sugar left behind in the baking pan. That’s normal and you can discard it. Just try to get as much of the liquid out as you can.
Other recipes you’ll love:
- Pudim de Doce de Leite
- Doce de Papaia: Fresh Papaya Jam
- Traditional Cape Verdean Cuscuz (Cuscuz de milho)
- Mini Donuts – Cape Verdean Donetes
- Cape Verdean Fungine (Gufonginho)
Pudim de Leite- (Cape Verdean Style Flan)
Ingredients
Pudim
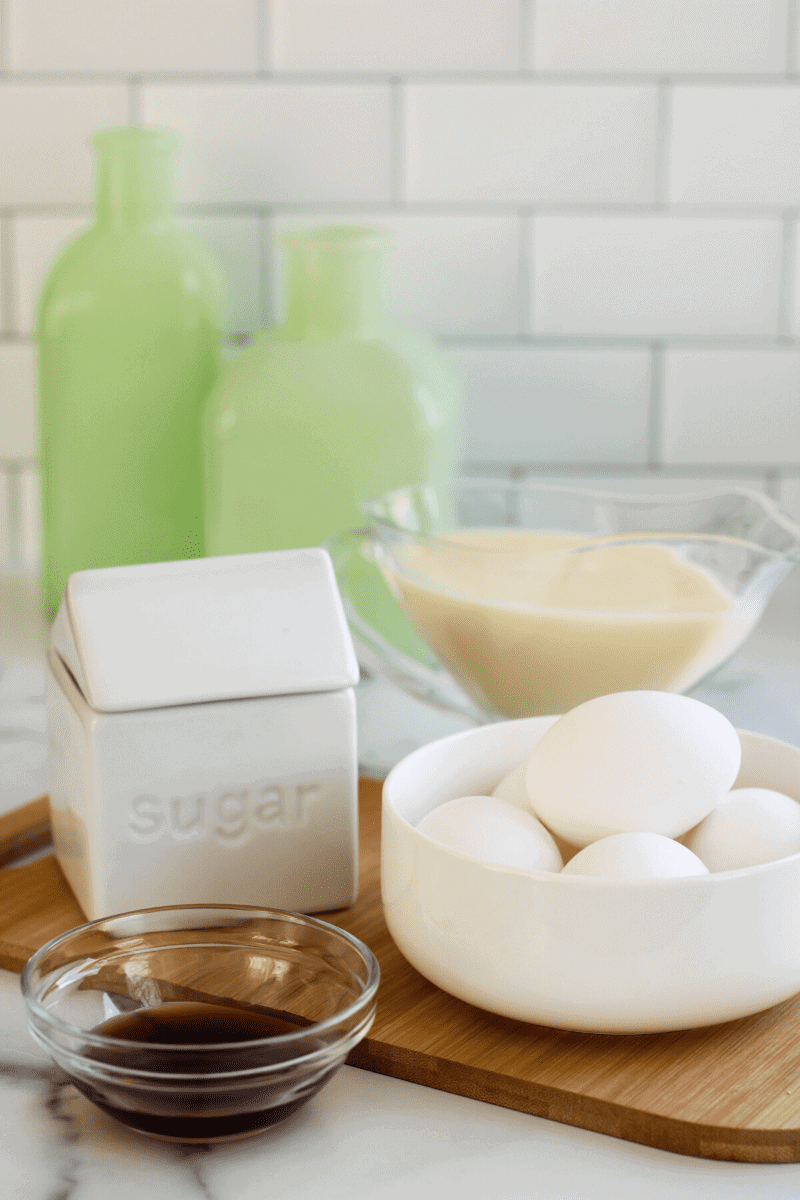
- 14 ounce can sweetened condensed milk
- 13.5 ounce can coconut milk 12 oz. can evaporated milk*
- 4 whole eggs
- 2 egg yolks
- 3 tablespoons heavy cream
- 2 teaspoons vanilla extract
- ½ teaspoon salt
Caramel Syrup
- 1 cup sugar
- ½ teaspoon salt
Other
- 4-6 cups boiling water (for the water bath)
Instructions
- to 350 degrees F.
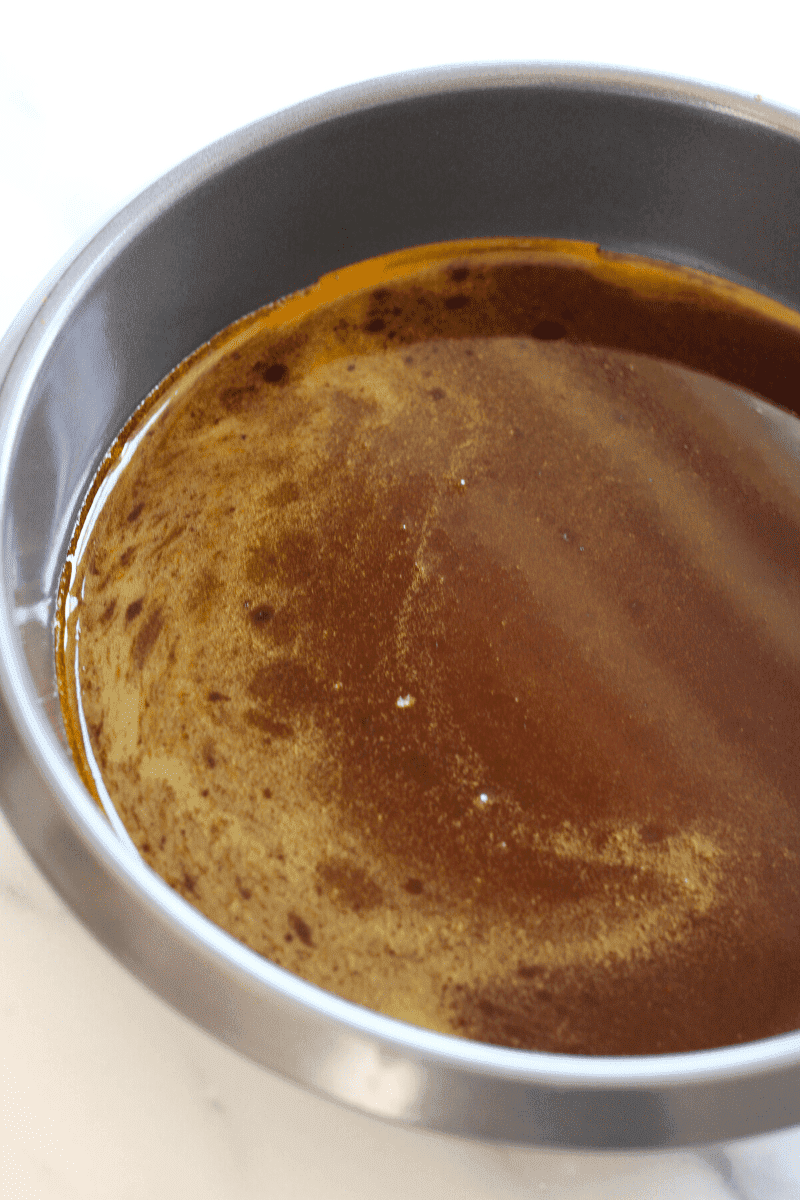
- by heating 1 cup of sugar in a shallow pan. Spread it out in an even layer and use a rubber spatula to stir over medium-low heat. The sugar will start to turn brown and clump together. Continue to stir occasionally until it liquefies and turns amber in color. This generally takes about 15 minutes. Make sure to watch it carefully so it doesn’t burn.
- into an 8-inch round baking pan as soon as you remove the caramel from the flame. Tilt the pan so that the caramel covers the bottom of the pan in an even layer. Allow the caramel to harden.
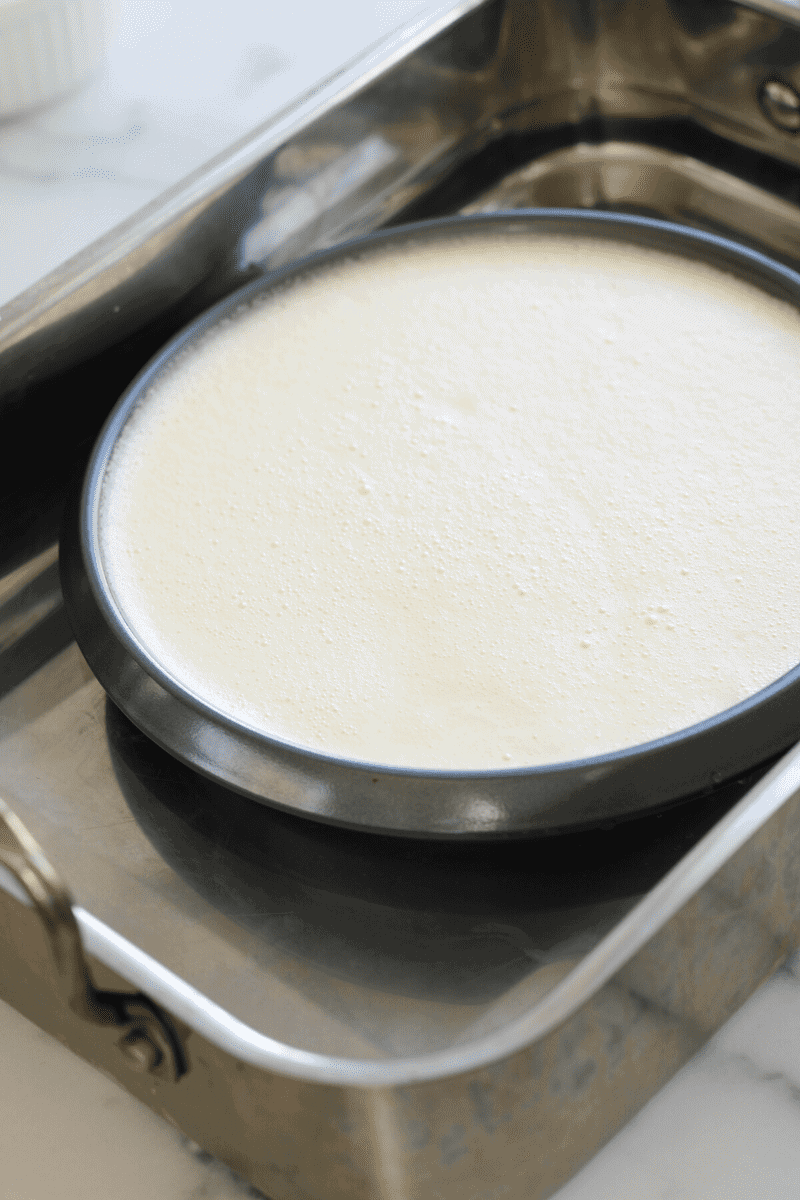
- by combining the condensed milk, coconut milk, whole eggs, egg yolks, vanilla extract, heavy cream and salt in a blender. Blend on high speed for 30 seconds.
- by placing the baking pan with the hardened caramel in the center of a deep roasting pan. Pour the boiling water into the roasting pan, around the baking pan. The water should come about halfway up the baking pan.
- Once the caramel has cooled and hardened, I spray a paper towel with a little bit of cooking spray and use the paper towel to grease the sides of the pan so the pudim doesn’t stick to the sides while baking.
- into the baking pan, over the hardened caramel. Use a mesh strainer to filter out any bits of egg (there really shouldn’t be any).
- and bake the pudim for 60 minutes. The pudim should be jiggly and resemble the texture and color of an omelette when it’s done. The center should be firm and will have a slight springiness if you touch the center with your finger.
- in the water bath for 15 minutes, and then remove the pan and let it sit on the counter for about 1 hour. Once the pudim is room temperature, let the entire pan cool in the refrigerator for about 4 hours or overnight.
- let it sit on the counter for about 15 minutes and run a butter knife around the sides of the pan to loosen the pudim. Place a dish over the pan and invert it. If the pudim doesn’t release right away, try tapping the bottom of the pan. The pudim should release and the caramel syrup will run down over the sides. There will be some hardened sugar left in the pan, this is completely normal and it can be discarded.
Alda Dhingra says
Your photography is gorgeous!
Crystal says
Thank you!!
Terry Vieira says
Brasilian pudim contains 7-8 egg yolks and 2-3 whole eggs. Texture is slightly different. Learned this from my 85 year old braslian mother inlaw. This is compared to the flan my spanish aunts make.